To run the forums, host the website, and travel, I charge a universal service fee for my reviews. This review was sponsored by EUNORAU. My goal is to be transparent and unbiased, this video and written review are not meant to be an endorsement of EUNORAU products.
Since 2010 EUNORAU has been a manufacturer of electric bikes sold around the world, more specifically in Australia, Europe and North America. Although there is a USA warehouse for finished electric bikes, (such as the EUNORAU E-TORQUE) their electric kits are shipped from HQ in Hangzhou China. They have quite a variety of kits on their site, including Bafang powered kits, and hub motor kits. Anything from a 250w to a 1000w system can be found there, but the Tongsheng system in this review adds some great variety to the conversion scene with a great combination of features that are hard to come by. I first encountered the system at company HQ in China, where I rode an equipped bike and really enjoyed it. Time was short, and I quickly filmed the bike and attempted to capture enough to make a full EBR for the system. Despite my best efforts, the review simply didn’t match the quality of other reviews on the site, so we agreed to have a kit sent so that I could give it the proper time an EBR deserves. I’m very happy this turned out, because having more time on the system, and putting the conversion together myself, I better understand the kit and can form a more experienced opinion.
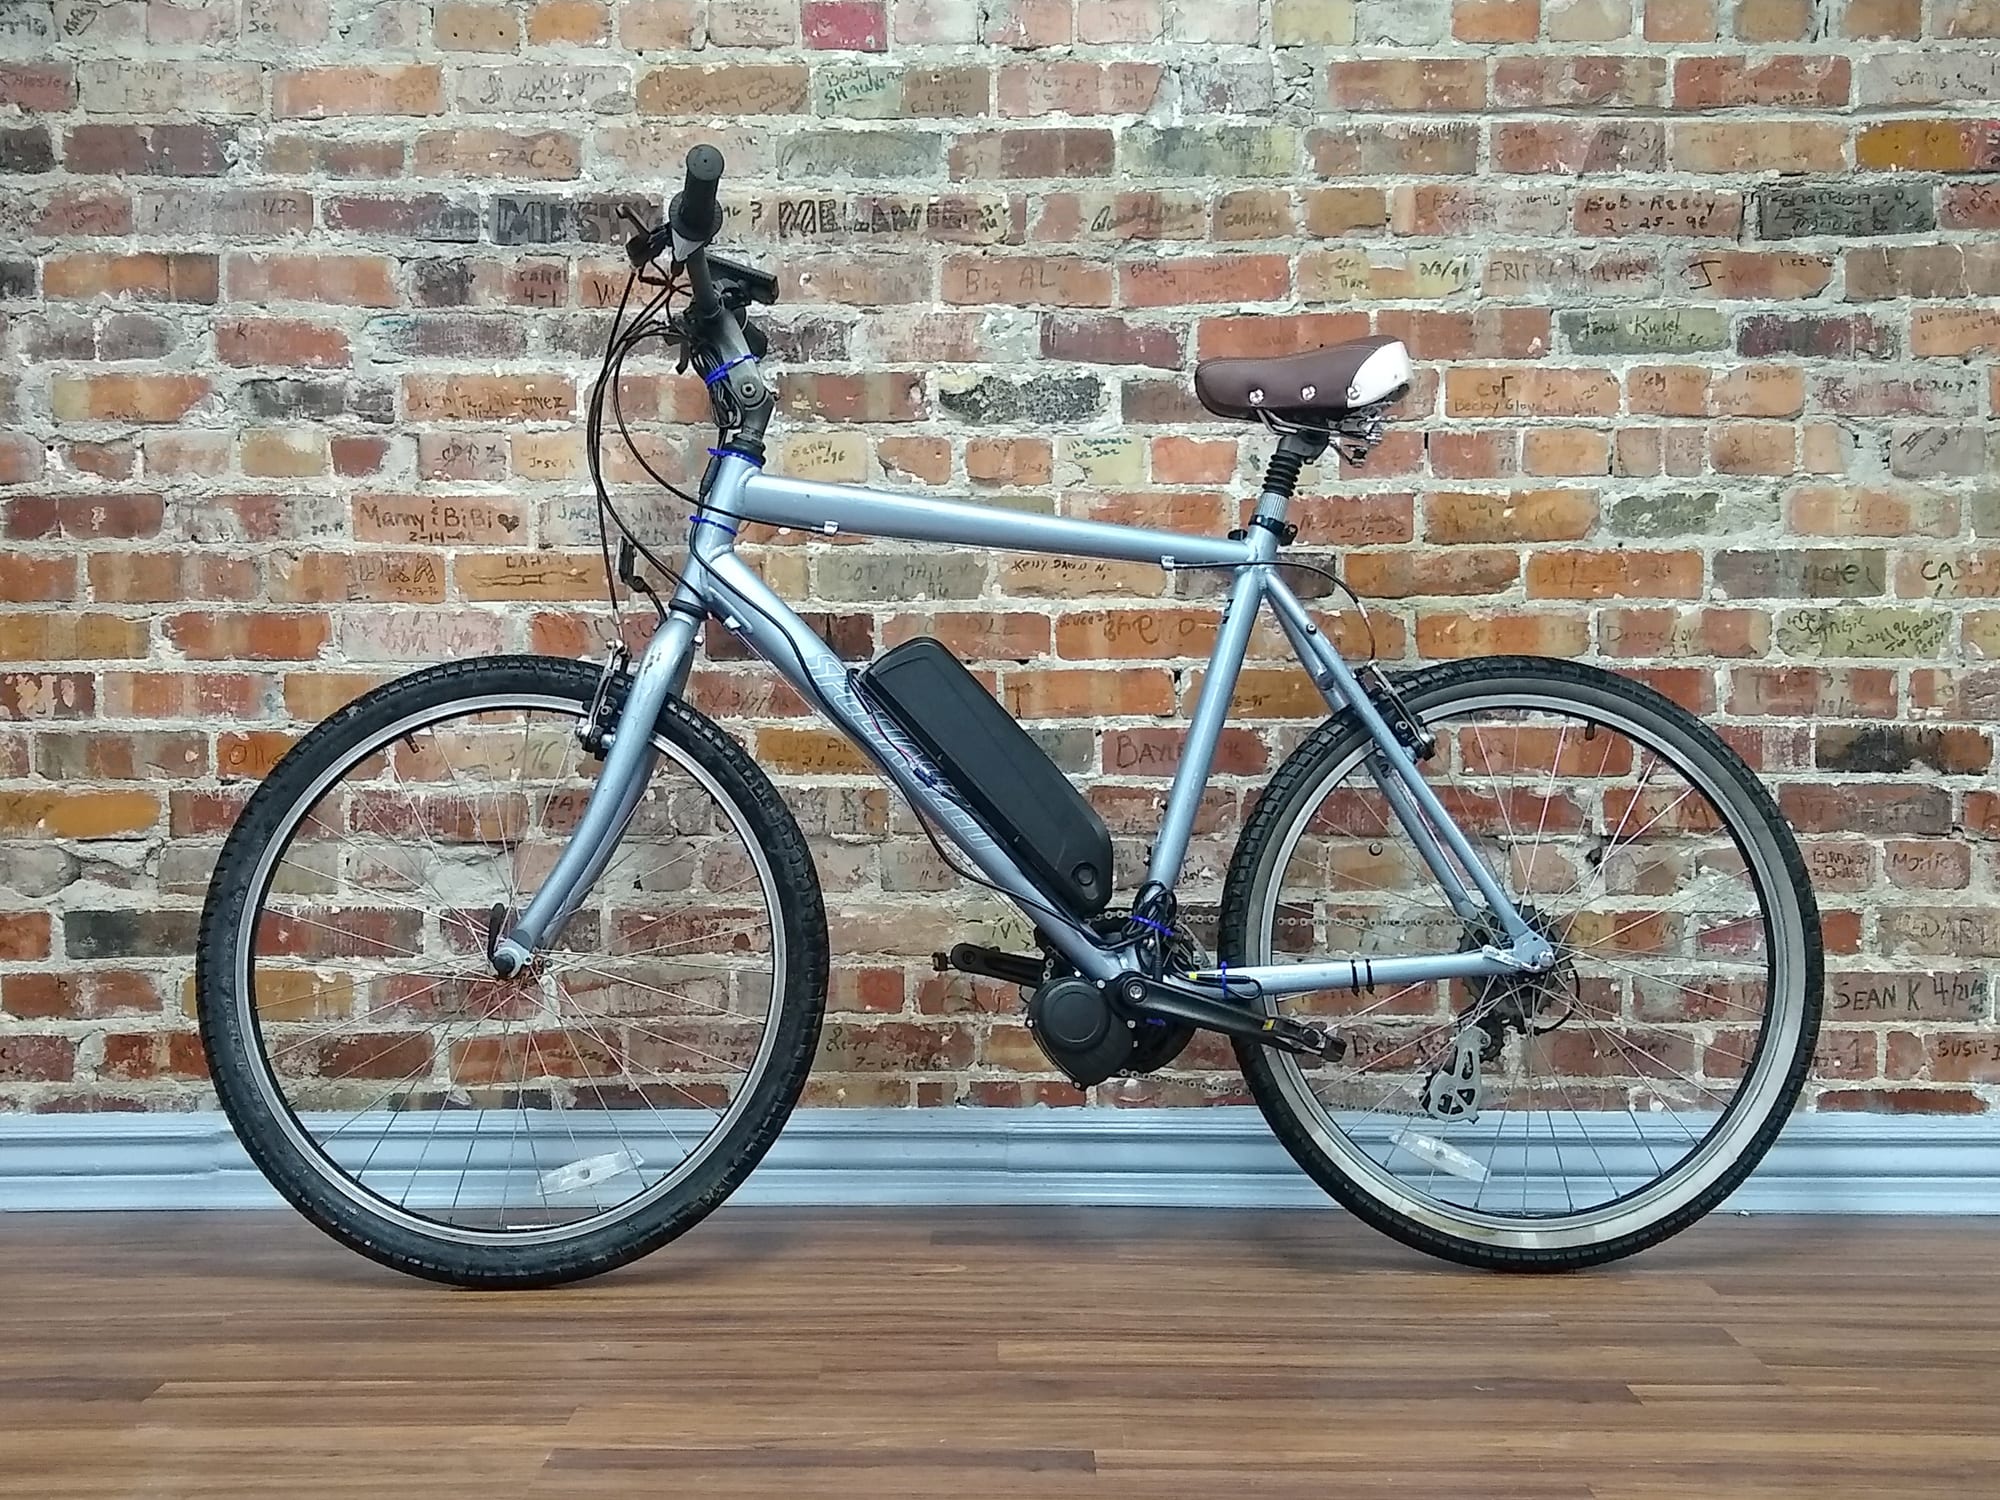
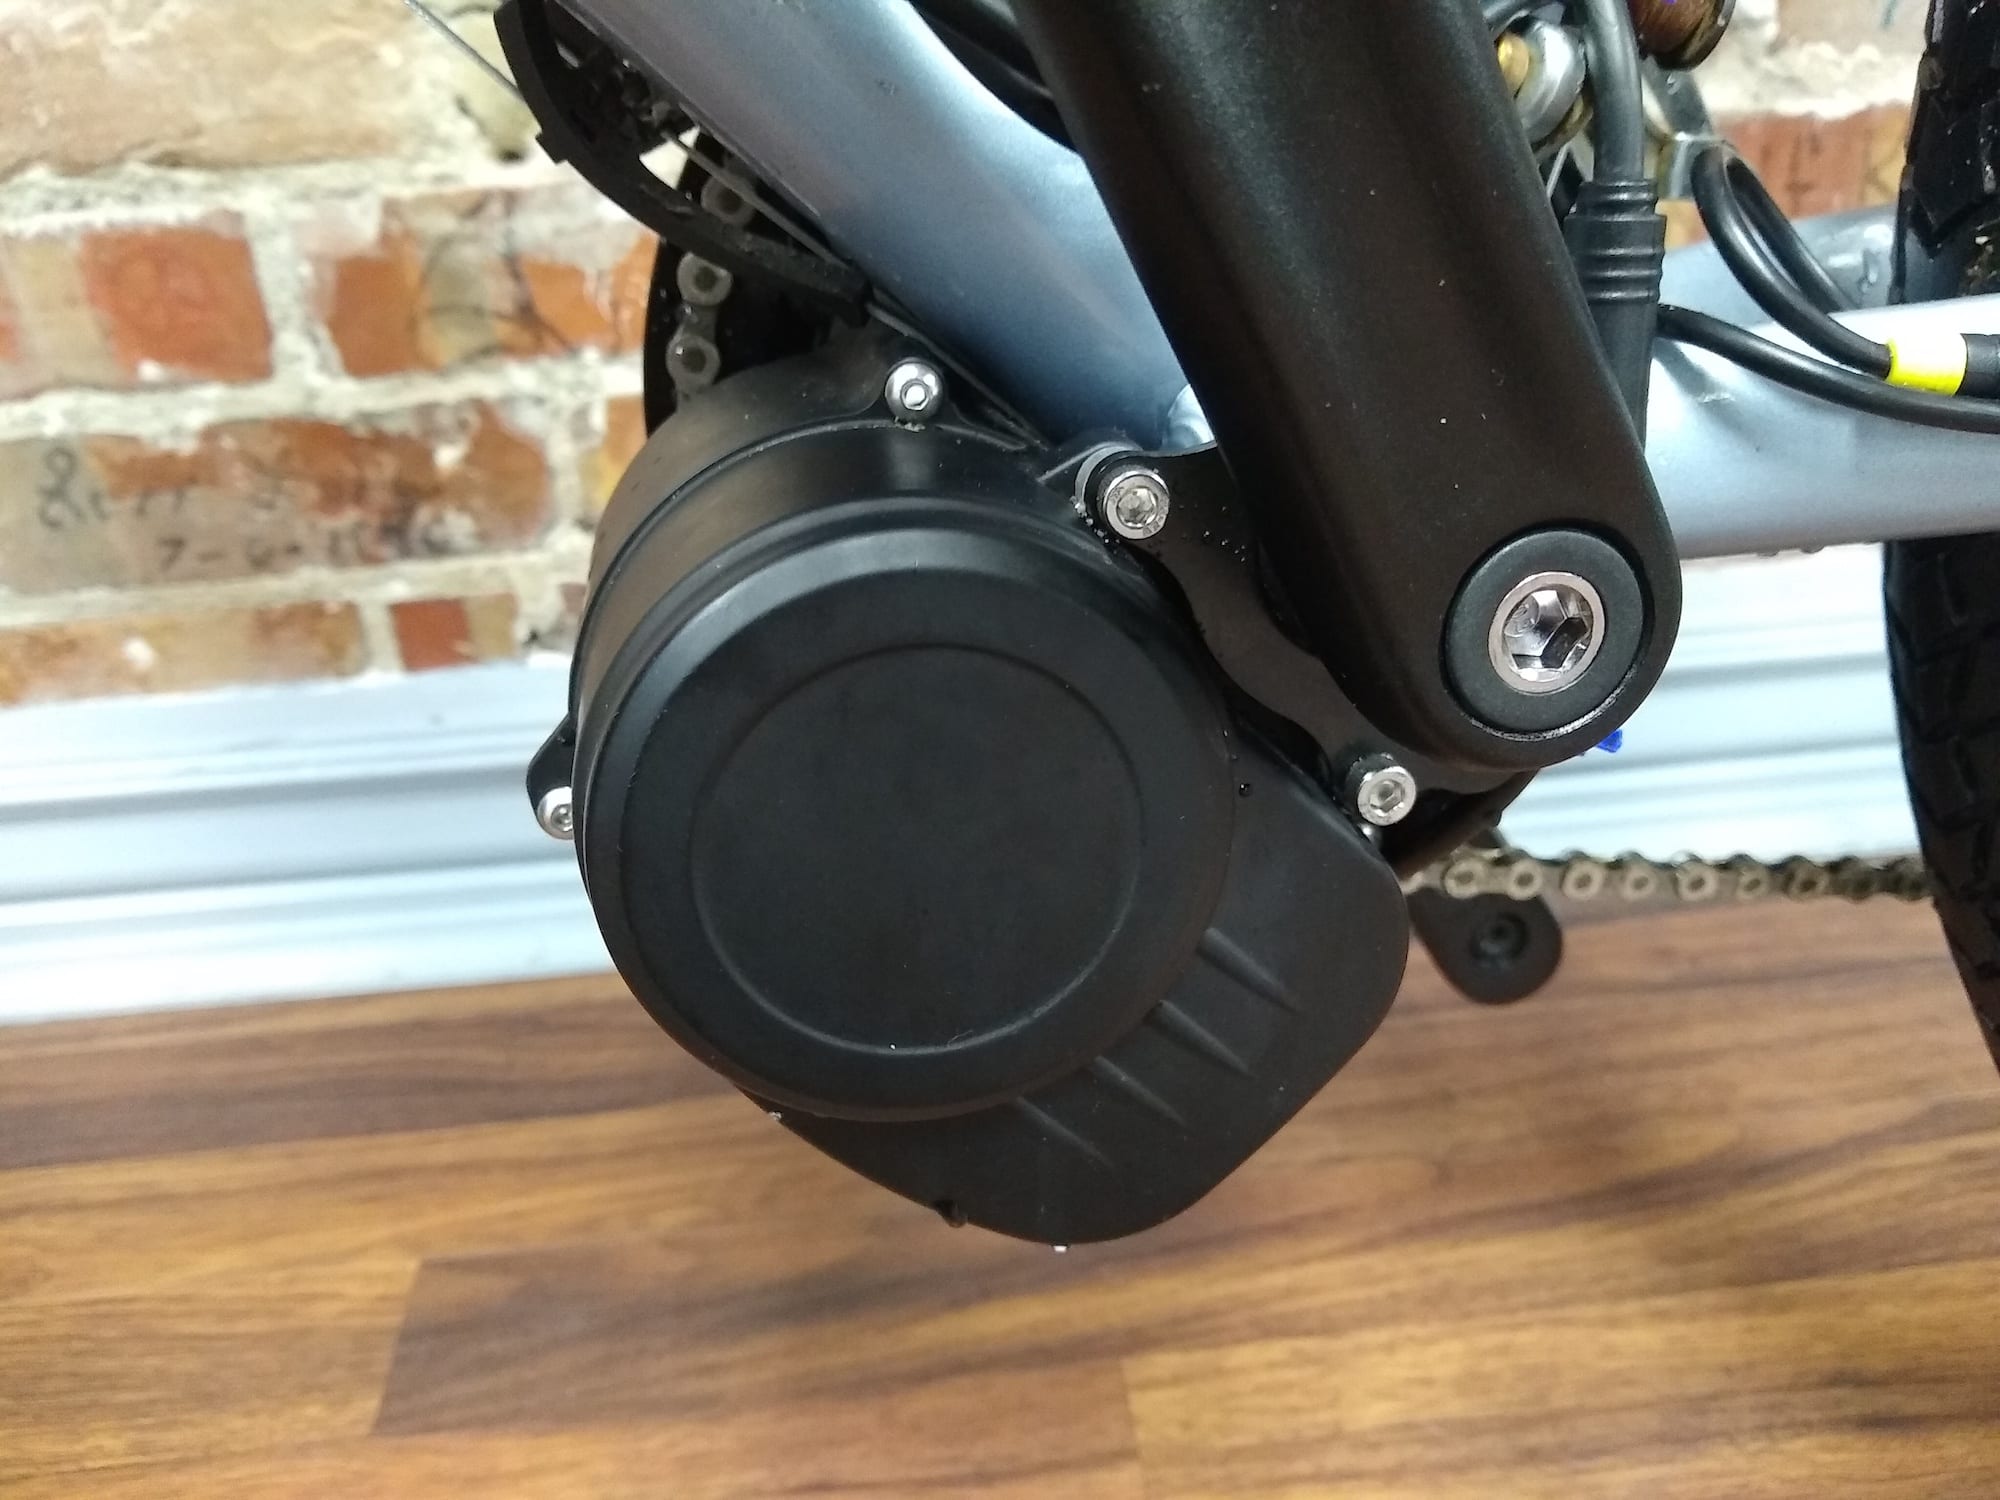
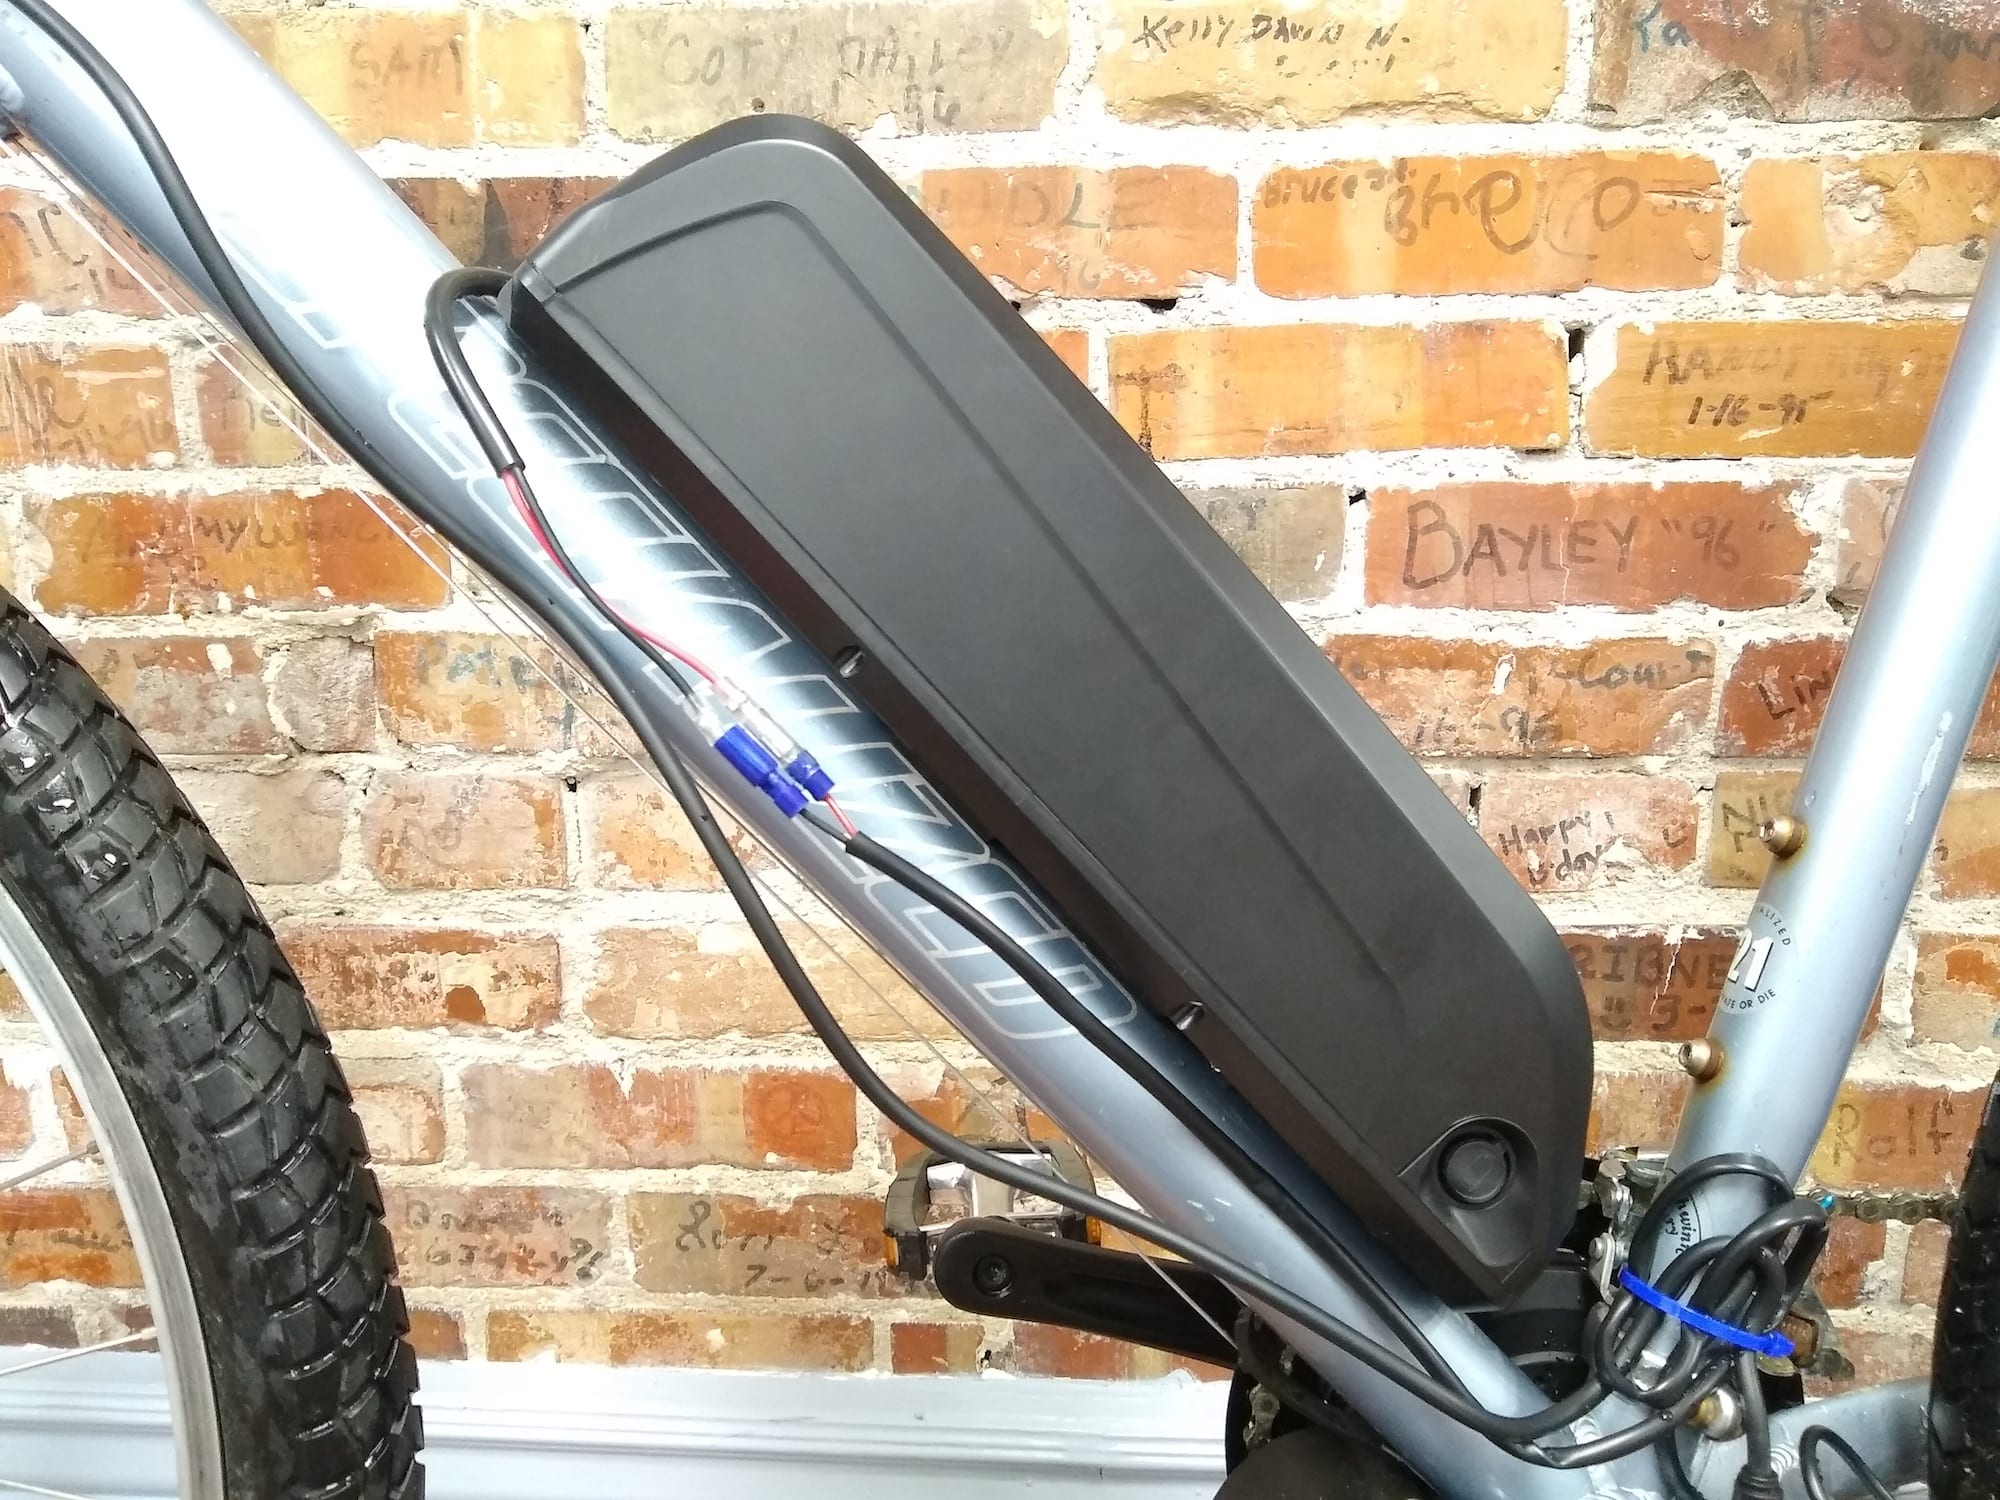
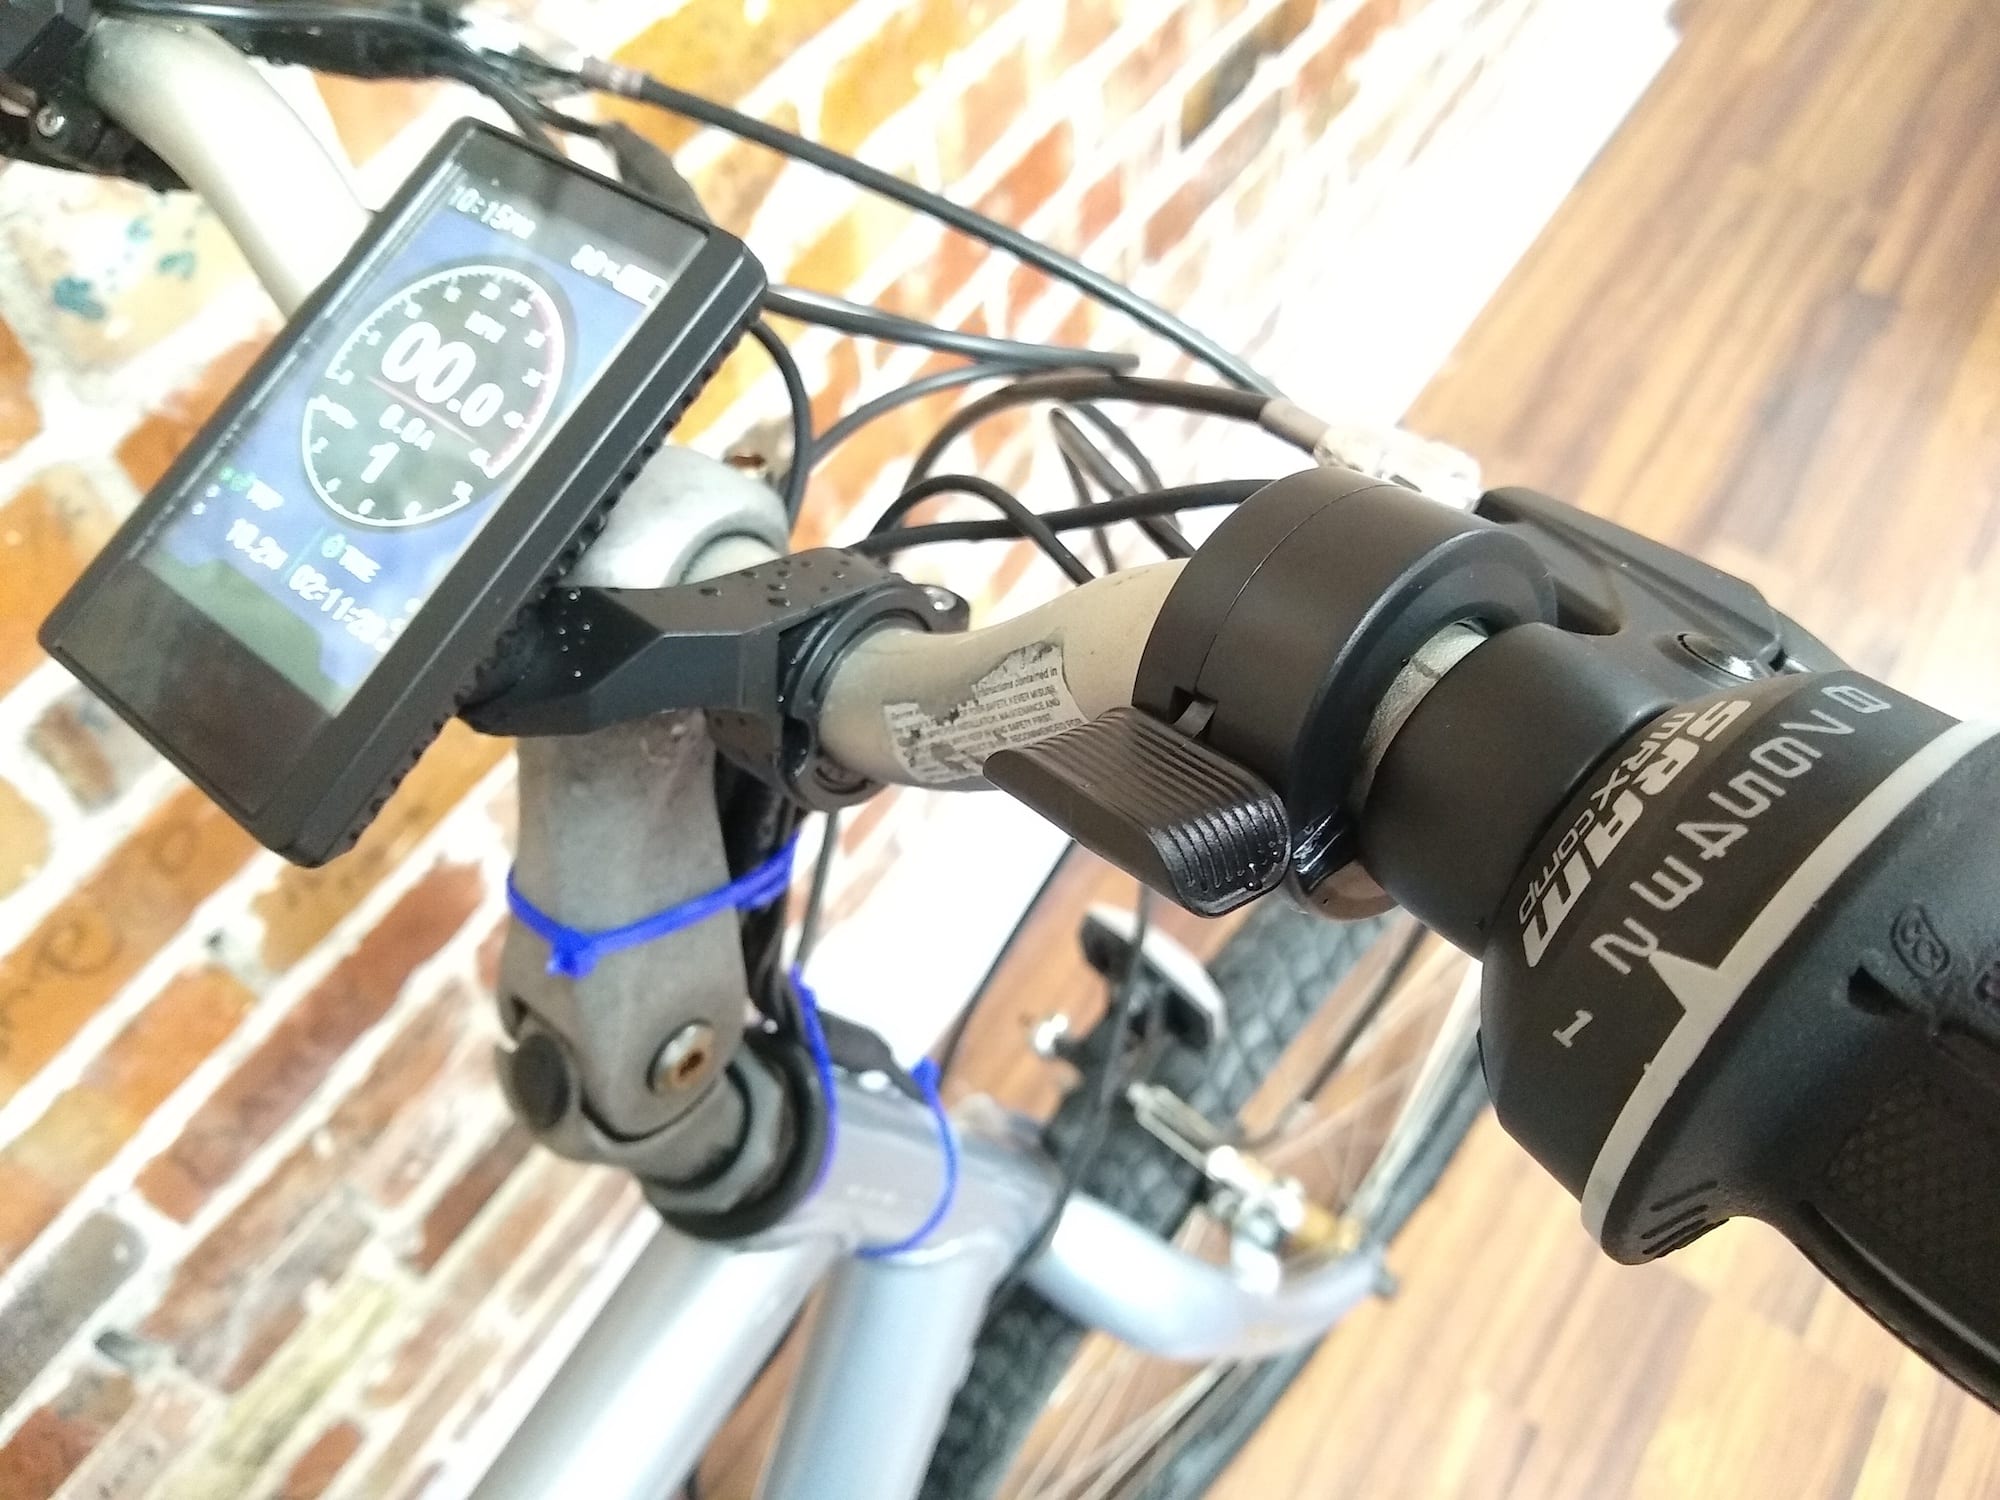
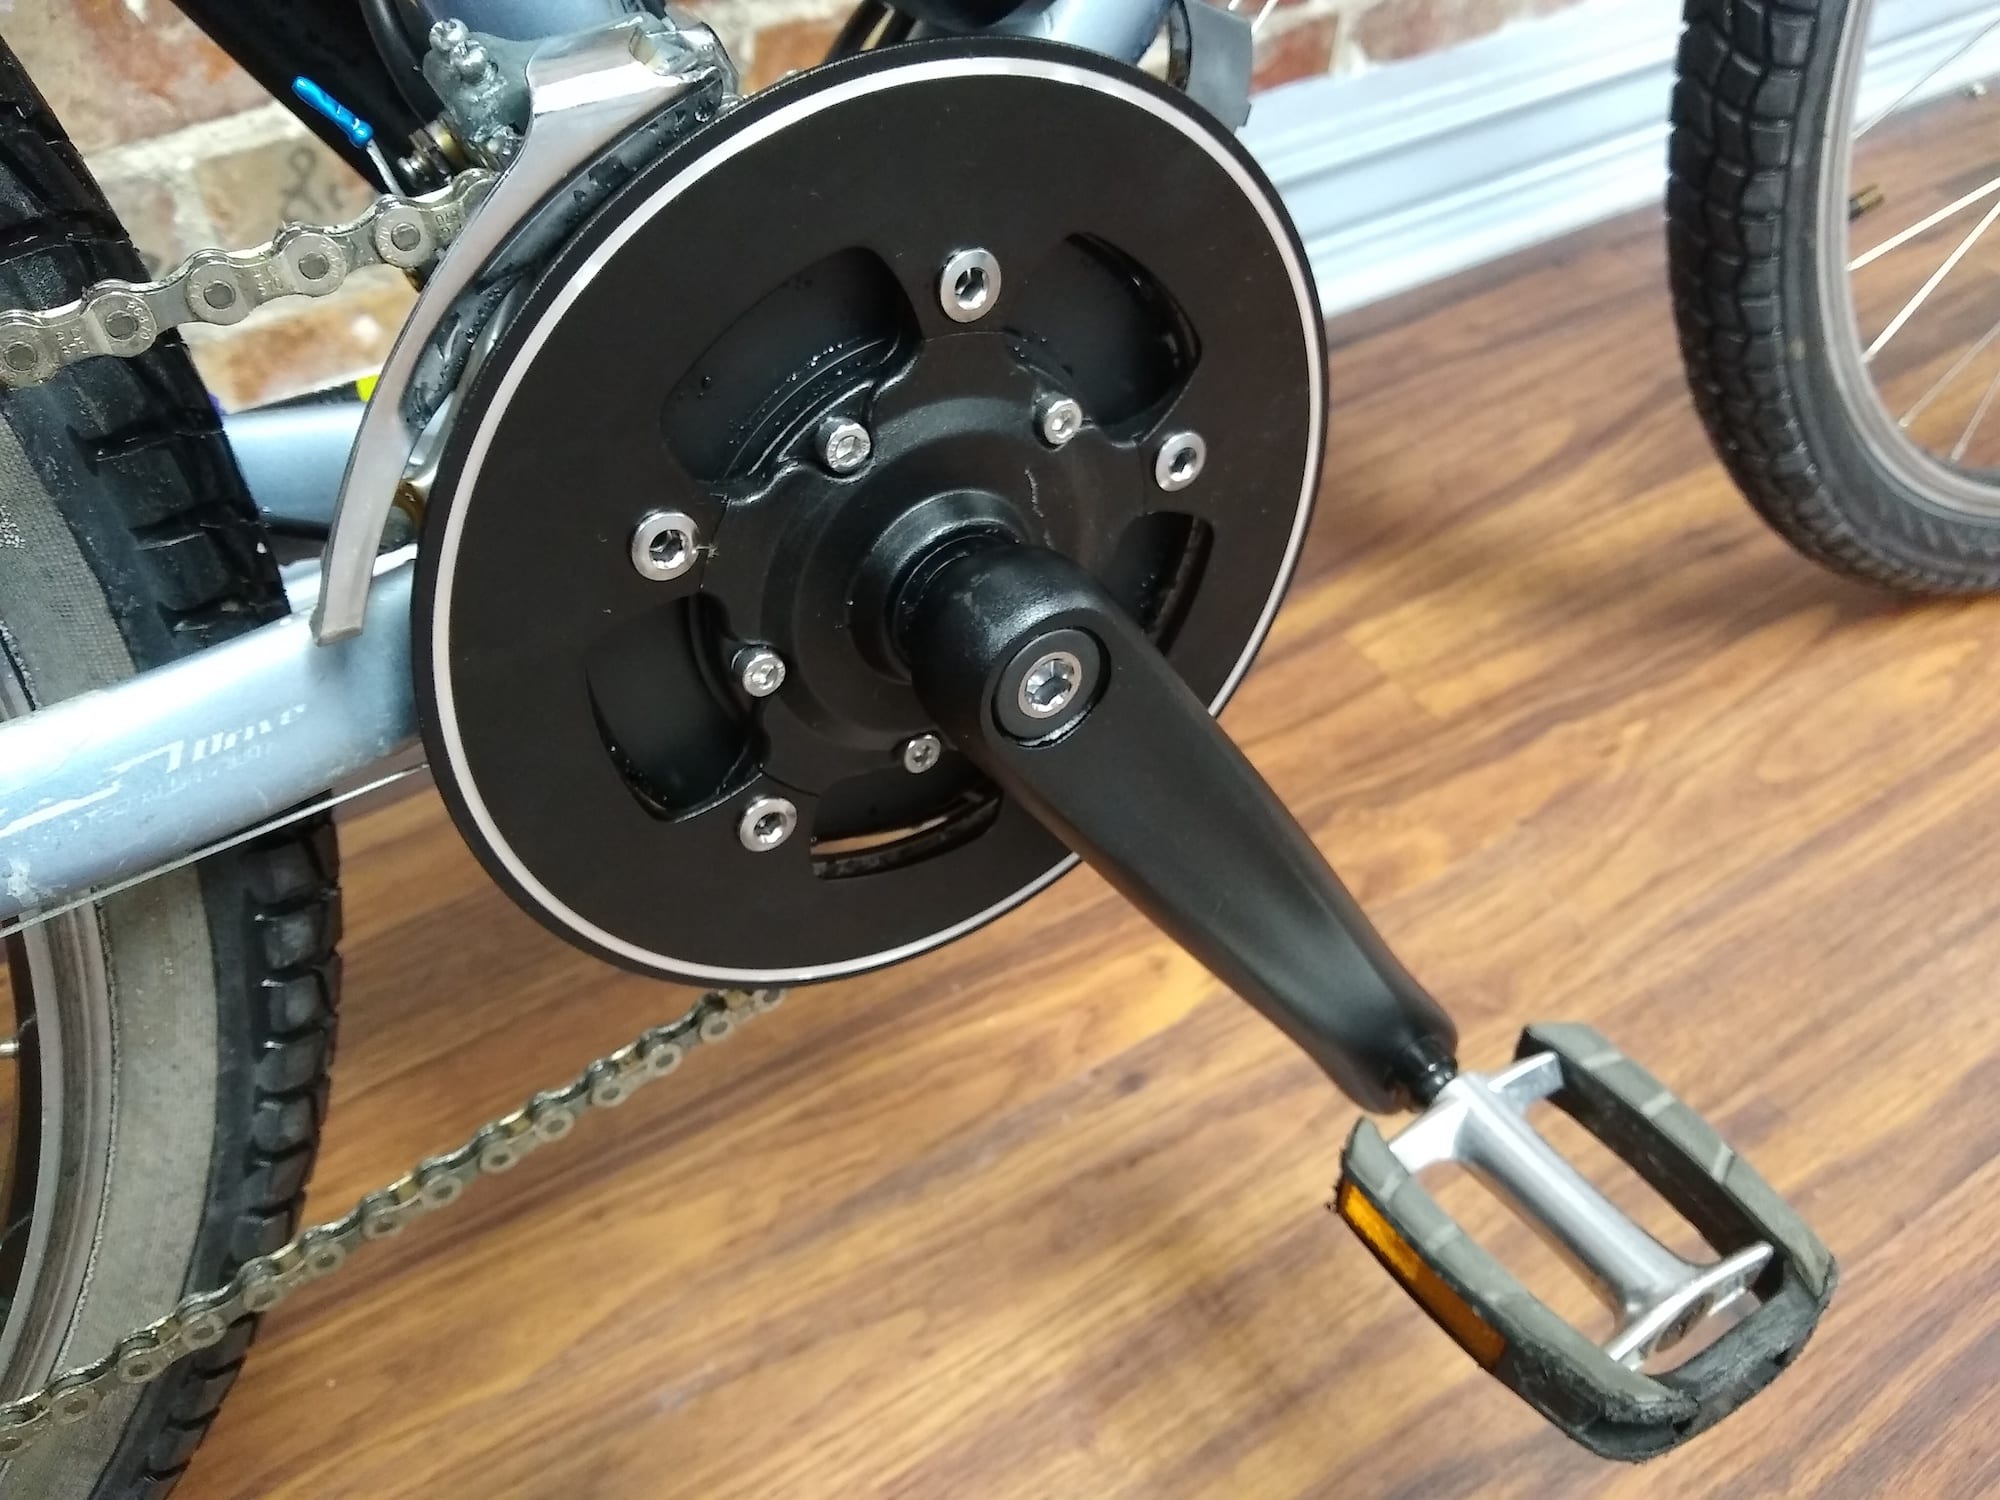
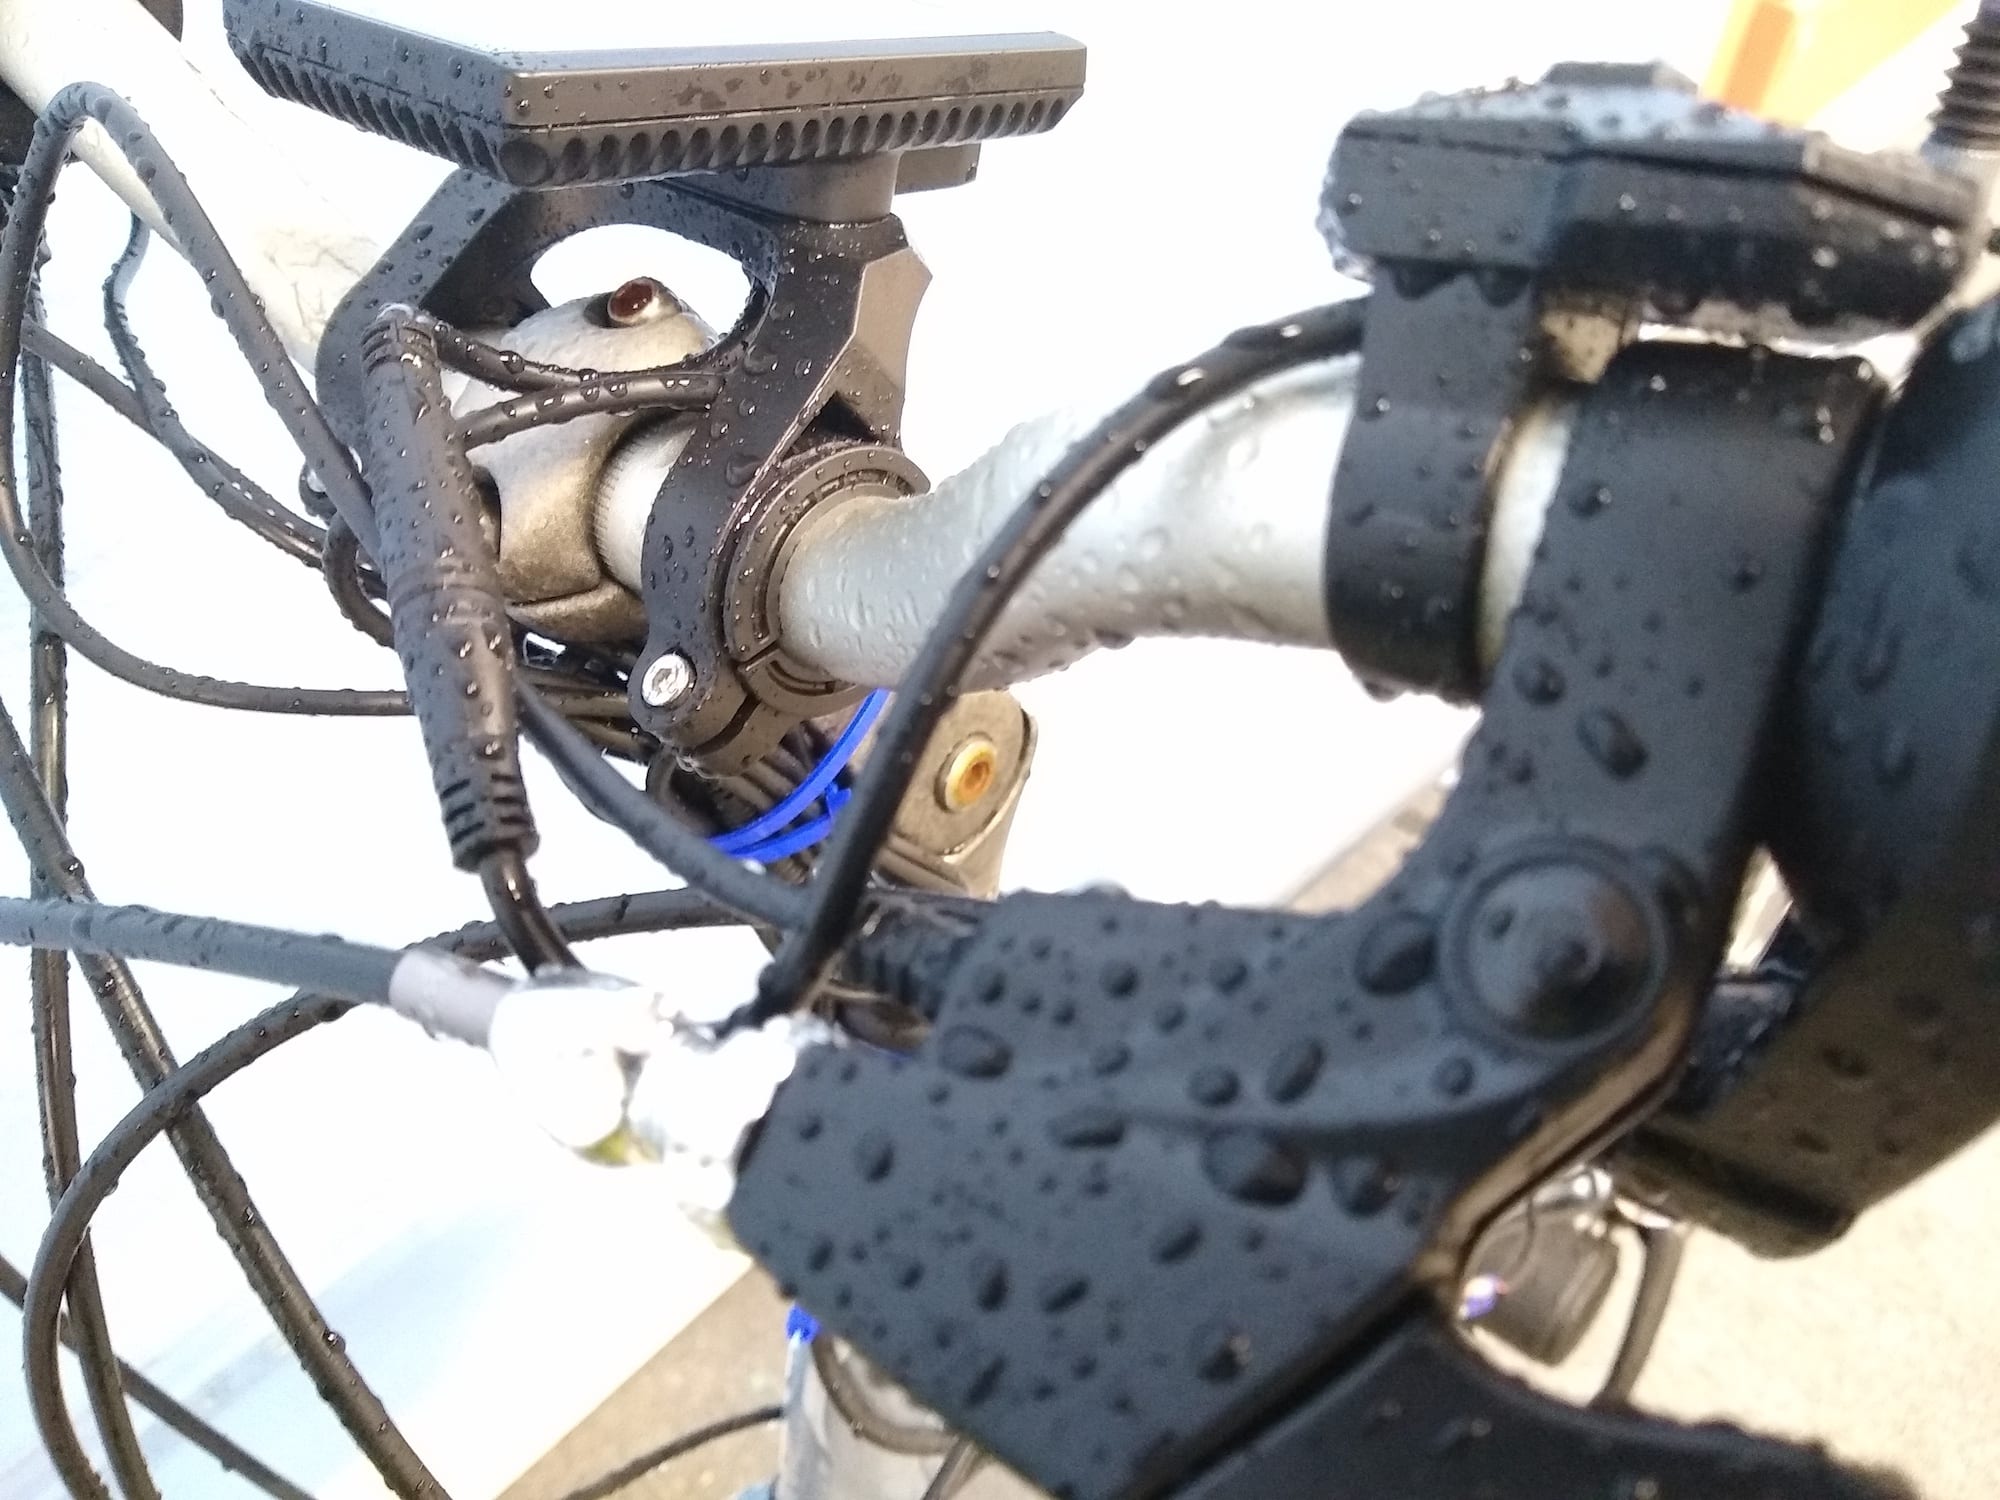
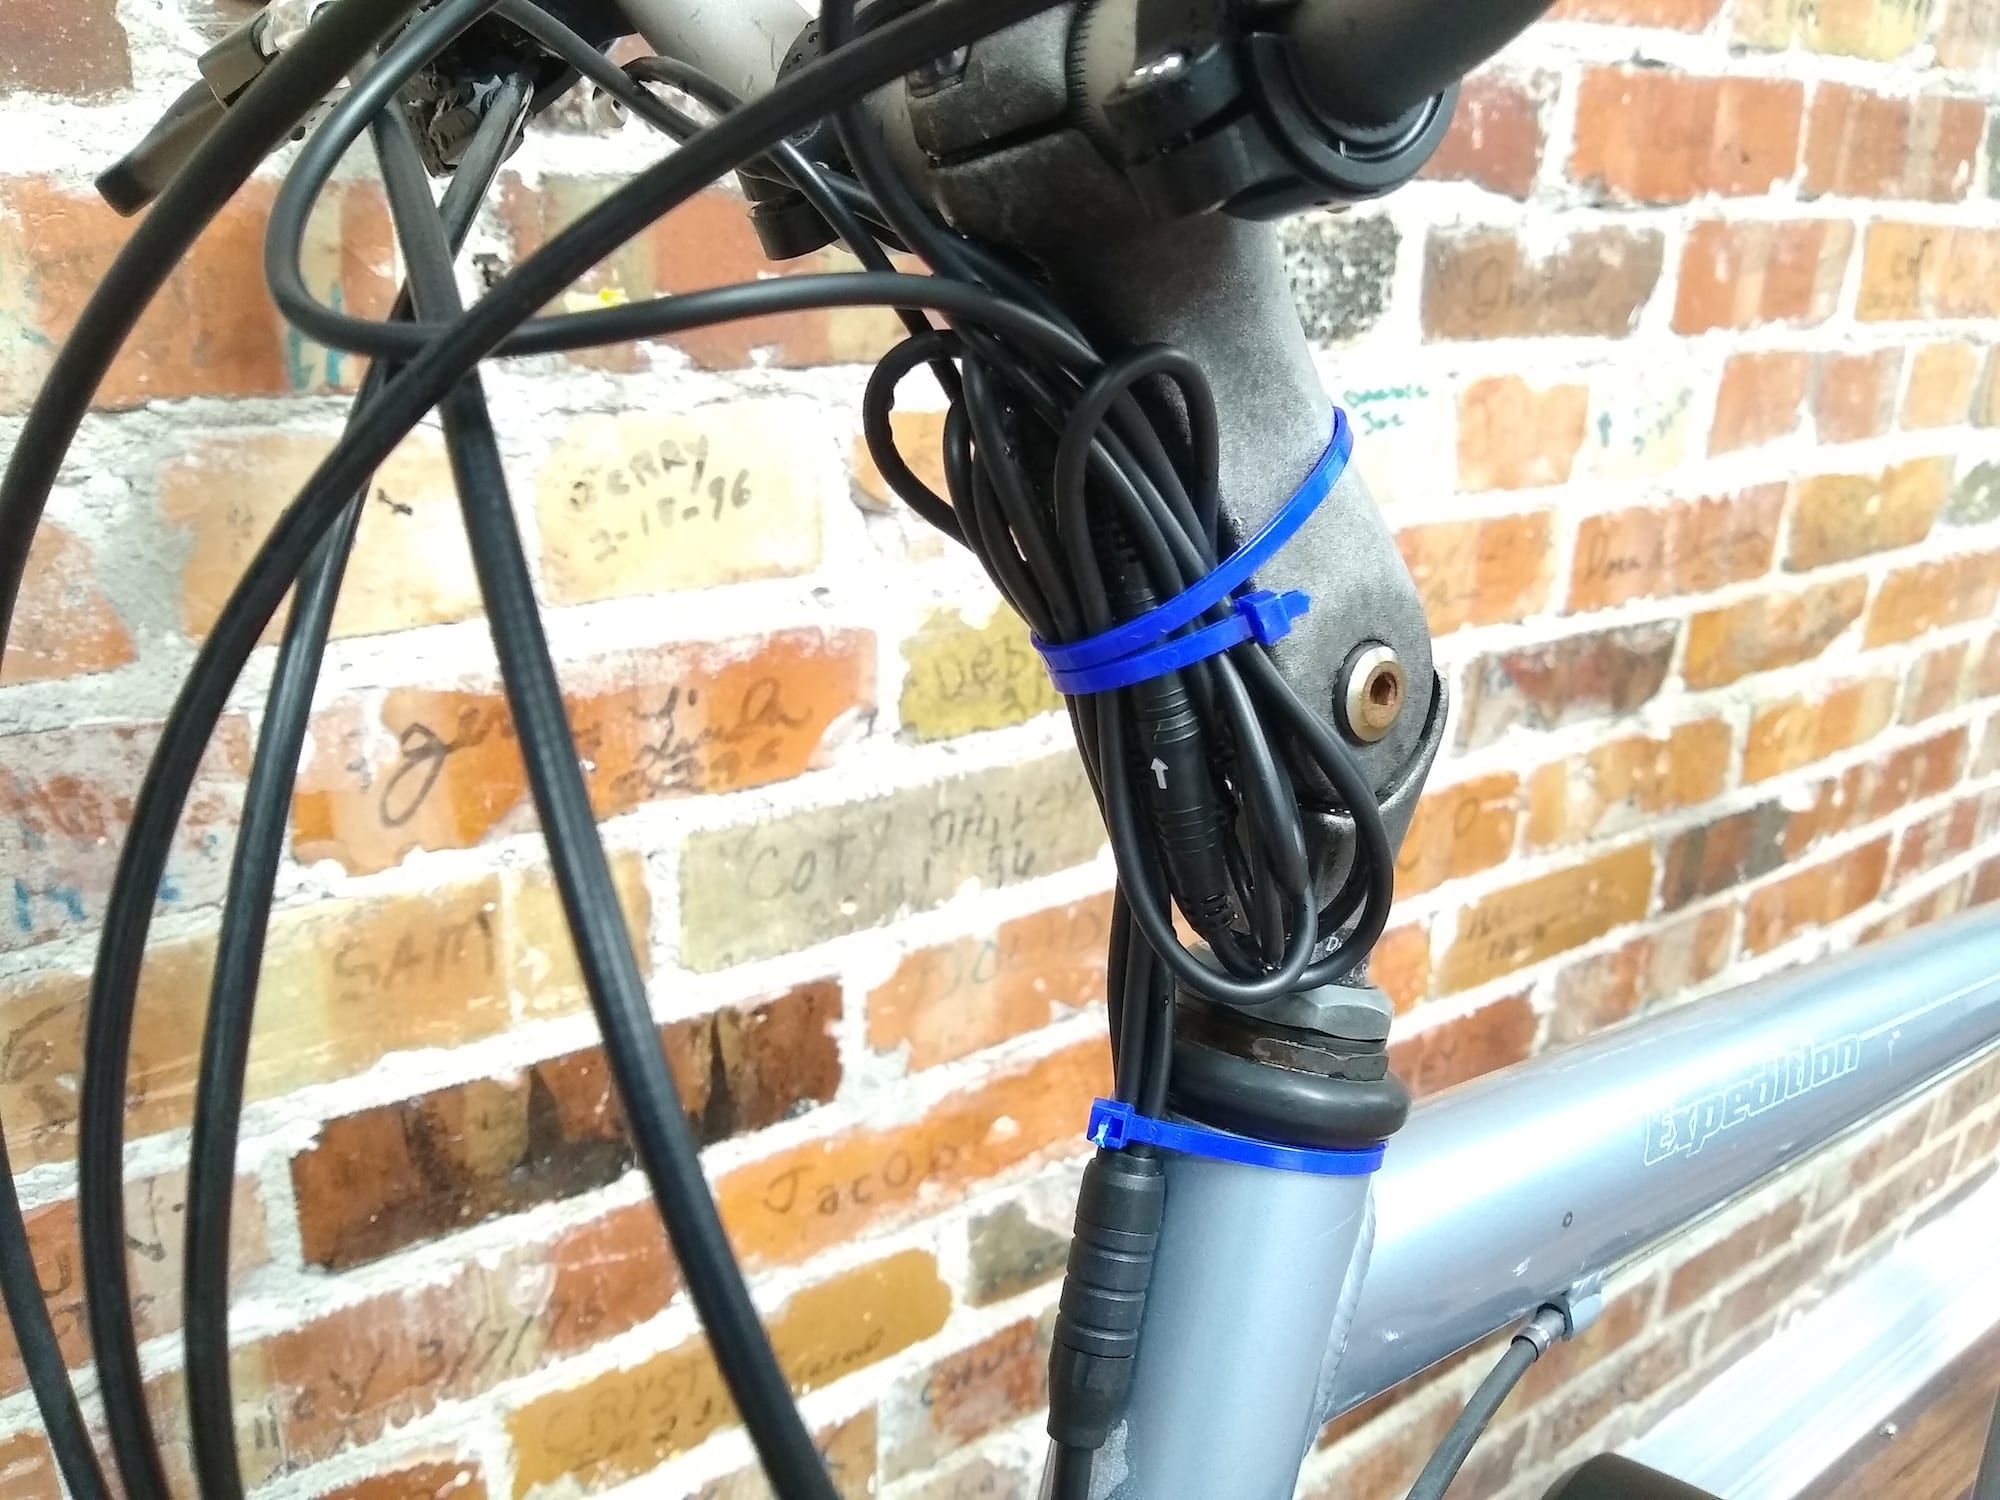
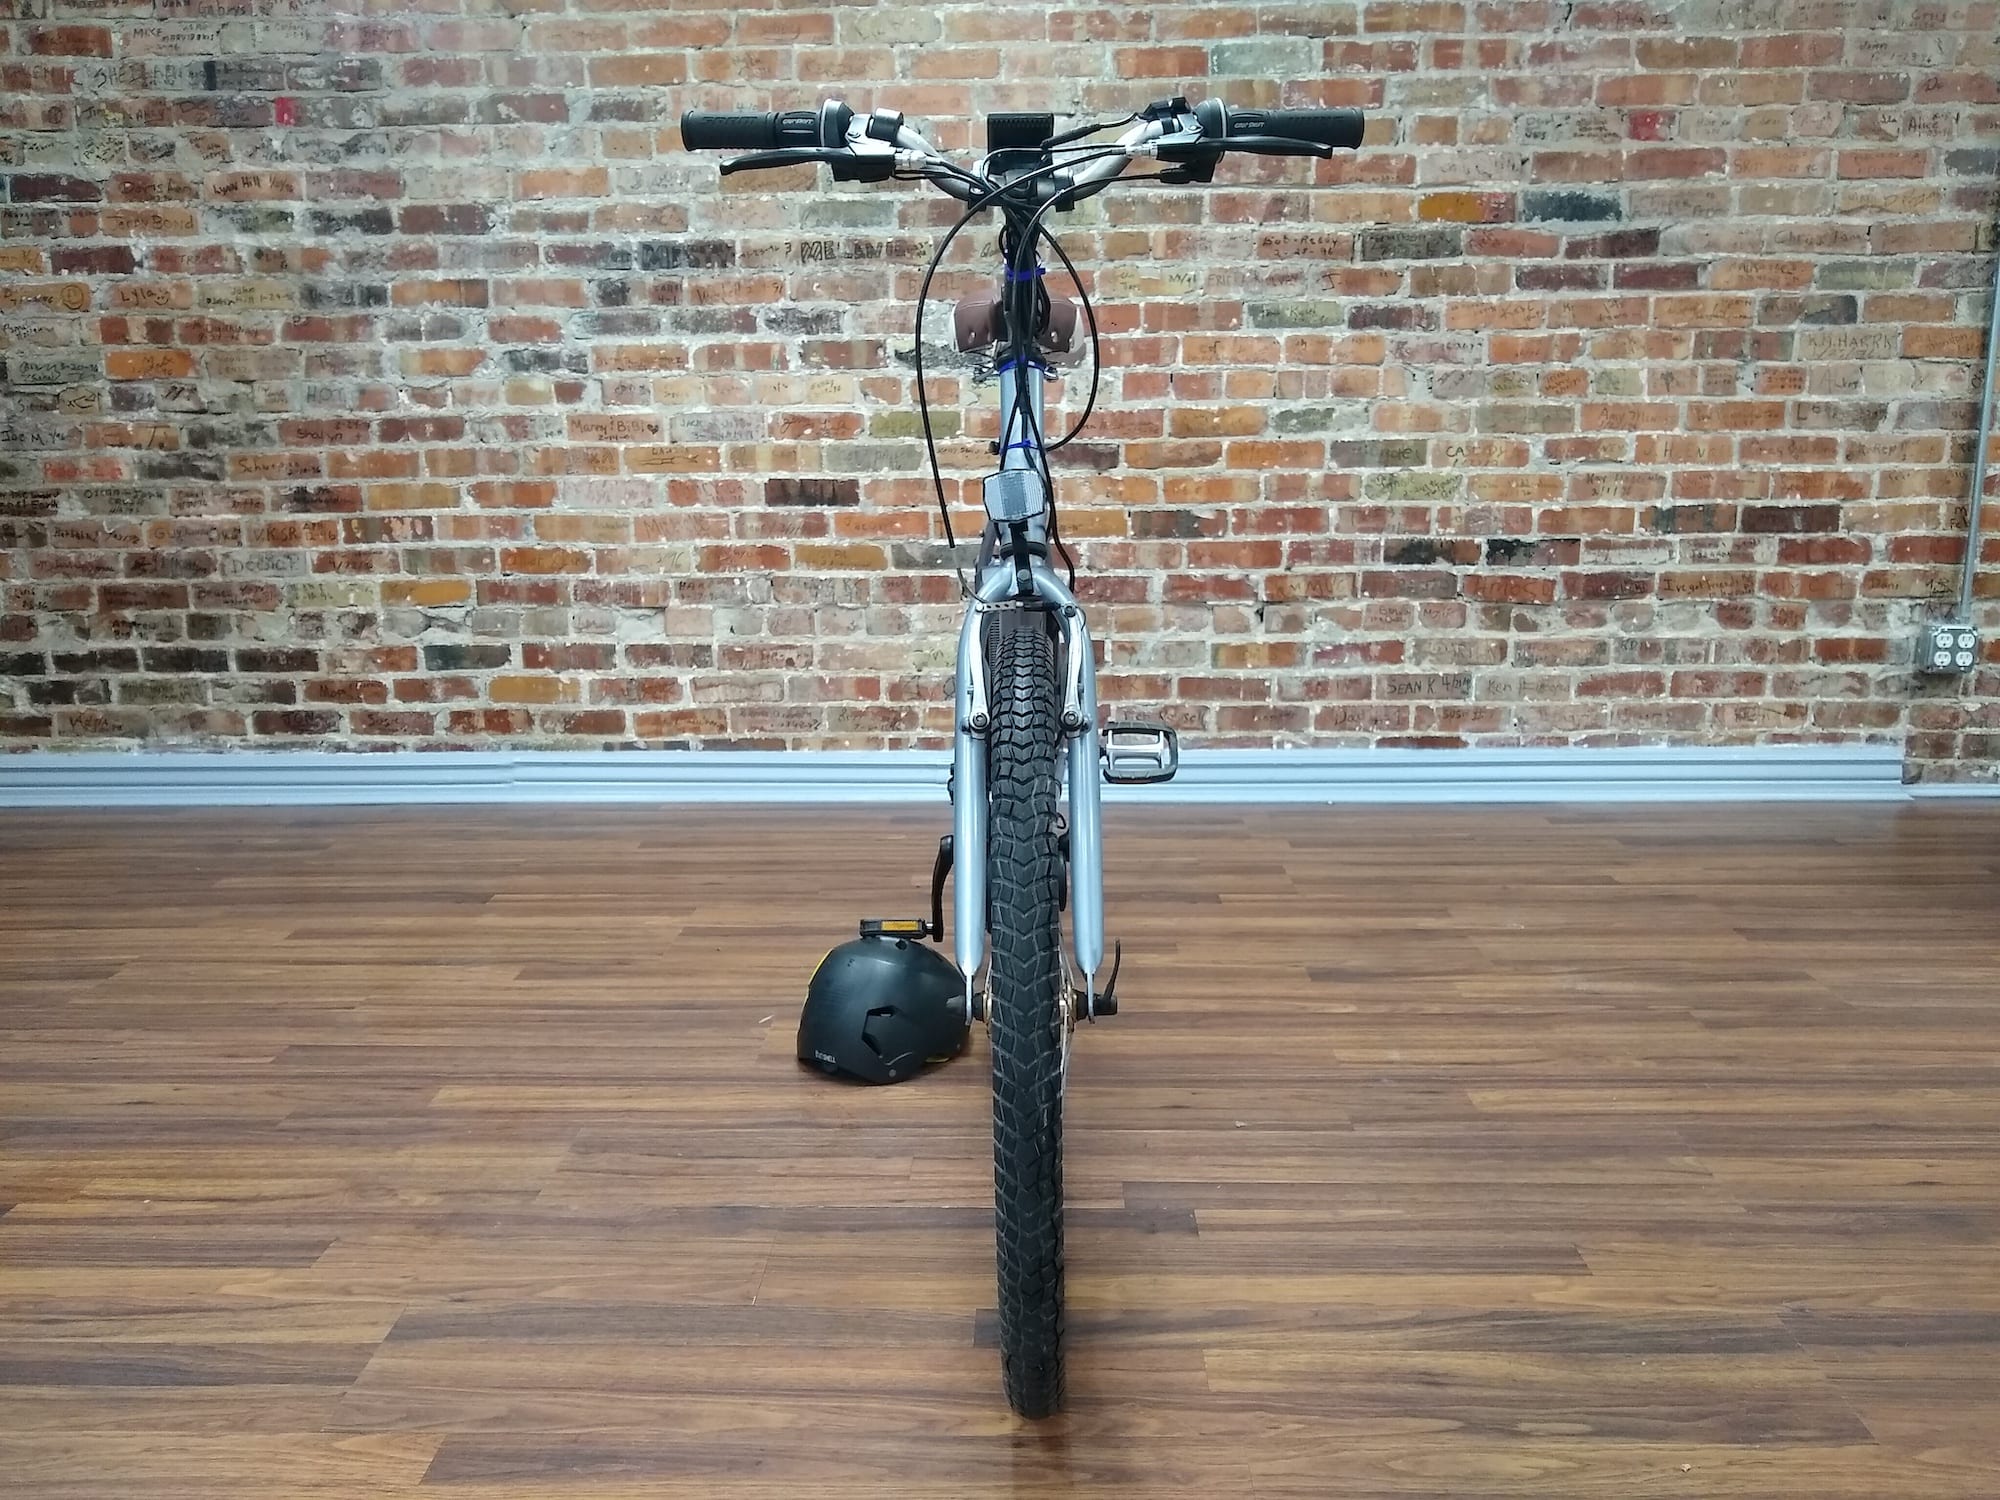
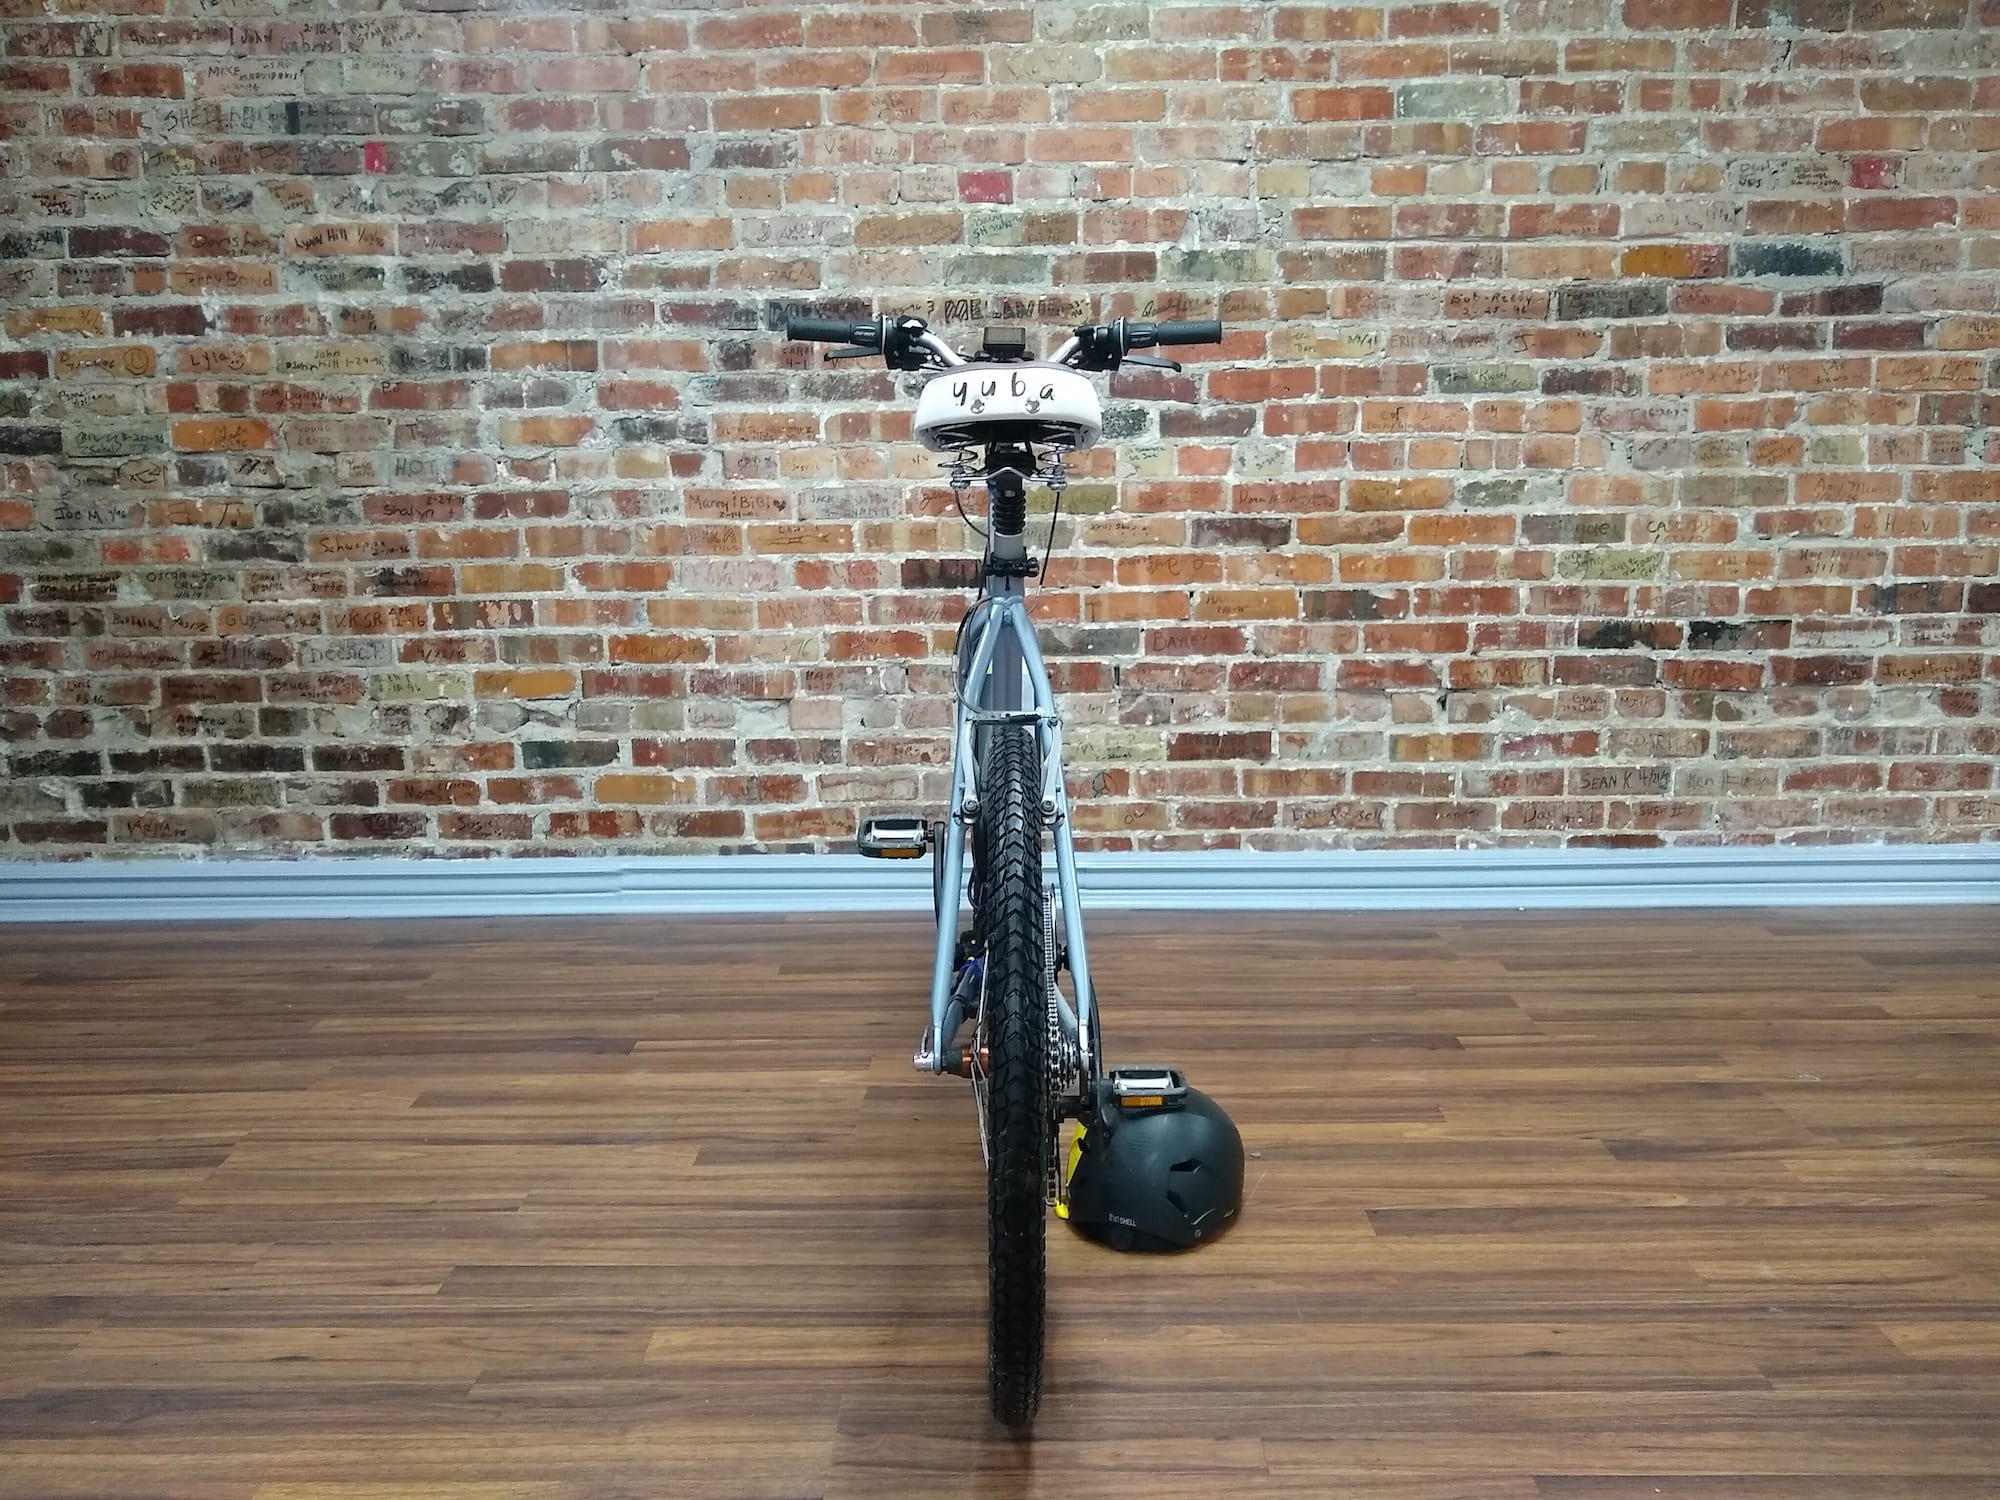
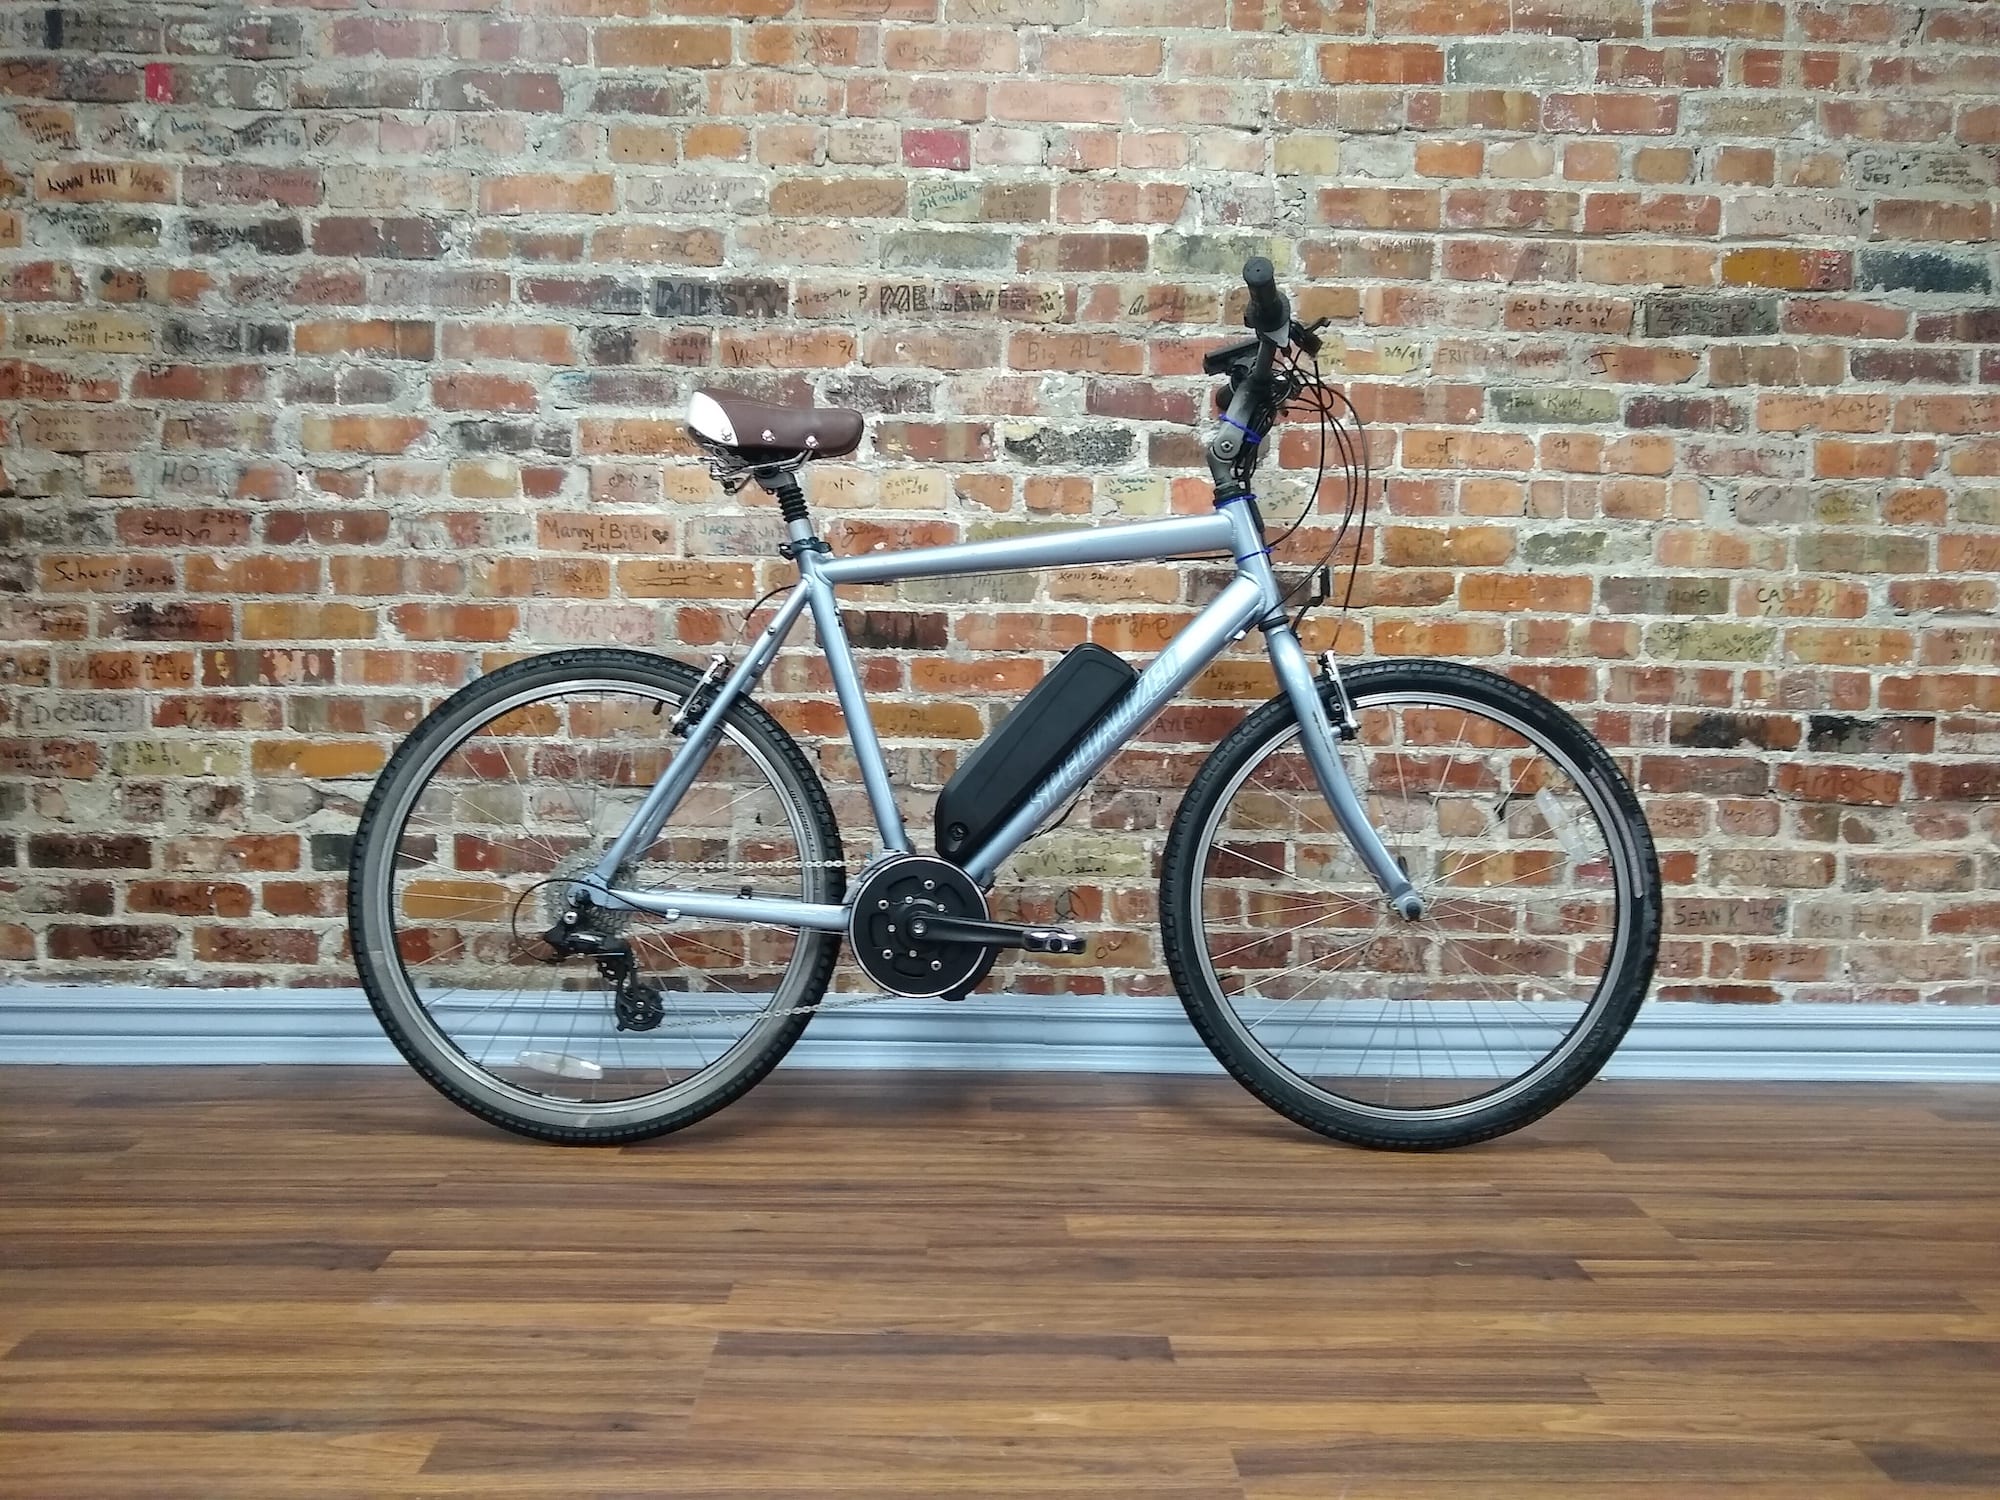
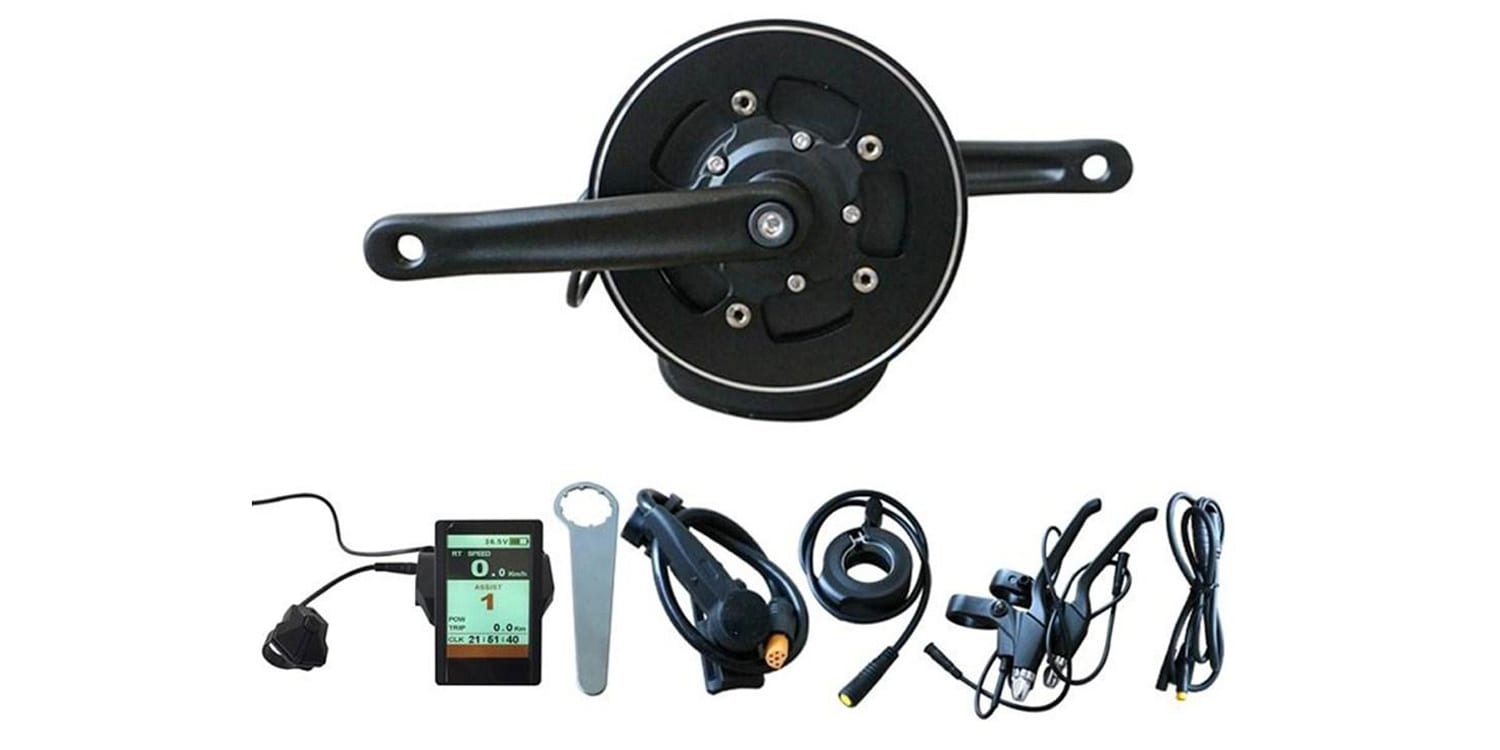
The kit took about 10 days to arrive, which was much faster than I had imagined. Although packaged quite well, the box contained no instructions, warranty card or contents list. For myself, someone moderately handy and with a firm understanding of bike parts, the conversion took about 3 hours. That’s counting from the time I unloaded all the package contents, to the time the tools were away, cleaned the area and swept. This, also included time for a very seized bottom bracket from the donor bike, and far more time looking for tools in an unfamiliar shop. The conversion isn’t without its compromises, due almost entirely to the donor bike; a 20-something year old Specialized Expedition. The old bike certainly has new life with the electric additions, but given the choice I would have used a better bike for this better system. I’d really like to put this system on a bike with disc brakes, and particularly with a higher mounting position for the battery. Since electric bikes are heavier, and rider faster, having upgraded brakes is a luxury I’m not accustomed to live without. The existing water-bottle mounts retained the battery too low, and in combination with a fairly narrow bottom bracket, the battery came into contact with the chainring on the motor. On account of this, I was obliged to flip the battery mount with the terminals on the top rather than the bottom. Keeping the battery in place is the securement of the mount, and the locking pin. Though not ideal, I’m alright with this orientation for the time being. I wouldn’t rely on it long-term (and I certainly wouldn’t sell it this way) but personally, I’ll ride it until I can find a better frame. The rest of the system went on without a hitch. The motor fit very secure, and the cables extruded from the back, allowing for a more “tucked in” look after the cables were zip-tied to the frame. Of course, the wires are quite apparent, but at the very least they come out of the correct side of the motor. The speed sensor, 4 to 1 cable (extending to the display) use waterproof connectors that are simple, color coded and very easy to install. The main battery terminals had simple bullet connectors that are easy to connect, however are not as nice as the waterproof connectors on the rest of the bike. This can be mitigated by a couple inches of heatshrink applied to the wires after installation, however, the rider will need to source that part. Oddly enough, the box did include two black zip-ties for mounting the speed sensor to the chainstay, but no extra zip-ties for securing the rest of the wires and cables. The display mounts onto the center of the handlebars, and includes two sets of spacers for use in different widths of handlebars. The remote switch for pedal assist uses a simple hex key for mounting to the handlebars, and the mount can be opened enough for instal without having to remove the grips, brakes or shifters. The throttle, on the other hand, was a complete circular mounting unit and did, indeed require removing the grips, brakes and shifter from the handlebars to accommodate the throttle. The 4 to 1 cable connects the motor and built in controller to the rest of the bike, and has a fairly long length of cable. In the case of this conversion, the excess was simply bundled with the stem. That extra space is made for use in a different bicycle, perhaps a long-tail cargo bike, cruiser, or other frame orientation that requires a longer path from the motor to the cockpit. After the conversion was done, and the battery charged, it was all uphill from there!
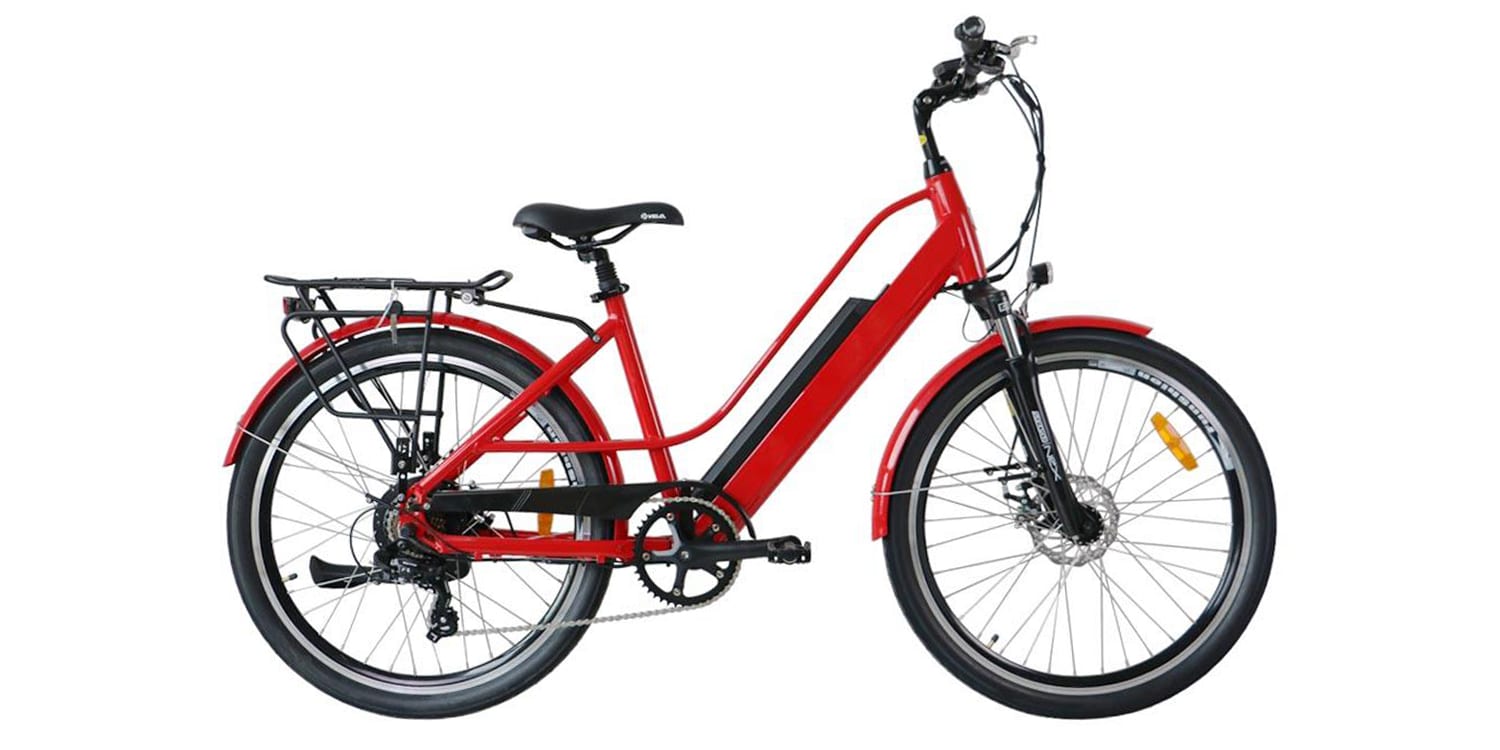
Of important note: be sure to adhere to your local laws concerning bicycle classifications. In some areas, converting a bicycle doesn’t change the legal definition, in other areas it will. If this were a production electric bike, it would classify as a Class 2 electric bike in many areas
Right out of the gate the first thing I noticed was the torque sensor. Most mid-drive conversion system I’ve used have only a cadence sensor for engaging the pedal assist. As a refresher: Pedal Assist is the function of engaging the electric motor with the use of the pedals, rather than a button, switch or throttle used by the rider’s hands. There are two main methods for reading pedal assist; cadence or torque. Cadence reads the rotation of the pedals, which can take time to kick in, but once moving is very effortless. Reading torque, a system can engage faster, and be fine tuned with much more detail. As you can imagine, torque sensing pedal assist is generally preferred, as with the kit; I really like the torque sensor on this system. It picks up very quickly, adapts discreetly, and is predictable for more technical, and confident riding. For the type of riding I did with the Tongsheng system, I really enjoyed it. I rode on urban and suburban streets with lightly varying terrain of road, sidewalk, grass, and dirt, all with ice and snow patches in Utah’s winter. Electrically, the bike surprised me with it’s adaptability. The first few miles of road riding, the system rode very smooth, with a nice easy take up to the power curve. This 500w motor isn’t a speed racer, it didn’t blow my socks off with an excess of power, and that’s great for my style. During this entry into the ride I began to think the bike wouldn’t be optimal for hills, but I was pleasantly surprised. When approaching a hill, even in a difficult gear, the pedal assist kicked in very powerfully, and quickly to assist the hill. This was a welcome change to the smooth riding I was encountering on the road. Another advantage of the torque sensor is that encountering ice patches on the road is far less intimidating. If the tires spin out on the ice, this immediately removes the tension from the pedals, and the motor follows suit as well. This inadvertent safety feature prevents the motor from running too long and tossing the rider on the ice. Based on the various terrain I rode, I can definitely see this system being used in various applications. As a city commuter, or easy going cruiser, it can easily accomplish both of these uses. If placed on a competent mountain bike, the slim profile and responsive torque sensor would be very nice on off-road conditions. One drawback to using the system on a mountain bike is the brake levers. The included brake levers are for a mechanical brake system, which may not fit the brakes of an advanced off-road donor bike. As a result, the owner may wish to not include the brake levers and internal motor inhibitors in the finished conversion. The brake inhibitors are not required for operation of the motor, however, they are included as a safety feature in virtually all production electric bikes I’ve seen.
One particularly nice feature of the the system is the throttle override. EUNORAU includes a handlebar mounted thumb throttle with the system, and is programmed for full override. This means that in any level of pedal assist, full throttle will engage the motor with full power. This is a very nice feature for getting out of tight spots, starting after a stoplight, of just for tooling around town. The throttle will not engage while the brake inhibitors are pressed, which is a very good thing. With a mid-drive system, the throttle will engage the front chainring, and therefore the rear gearing and the wheel in turn. If you ride the bike at full throttle, this does propel the bike in a particular gear, which has limitations. Using a hub drive system, a throttle engages the motor in the wheel, and is independent of the gearing, allowing for the motor to use its entire power curve at the level of the motor. Using the mid-drive throttle can spin out too quickly if left in a low gear, or can take a great deal of energy to get started if the gears are left too high. For a throttle bound rider wanting optimal acceleration and energy use, this requires shifting gears somewhat quickly, adding more wear and tear to mechanical parts over time. It’s rare to find a rider who insists on using only a throttle, as well as a mid-drive but perhaps this applies to you. Having a throttle option on a mid-drive eBike is not common among the production electric bikes. On the conversion side, a well tuned torque sensing mid-drive is not common, and adding throttle operation into the feature set is rarer still. This set of features is highly sought after in the eBike world, and does exist on some occasions, however, I believe the execution of the torque sensor is right on point in this system, and adds great value to the total set.
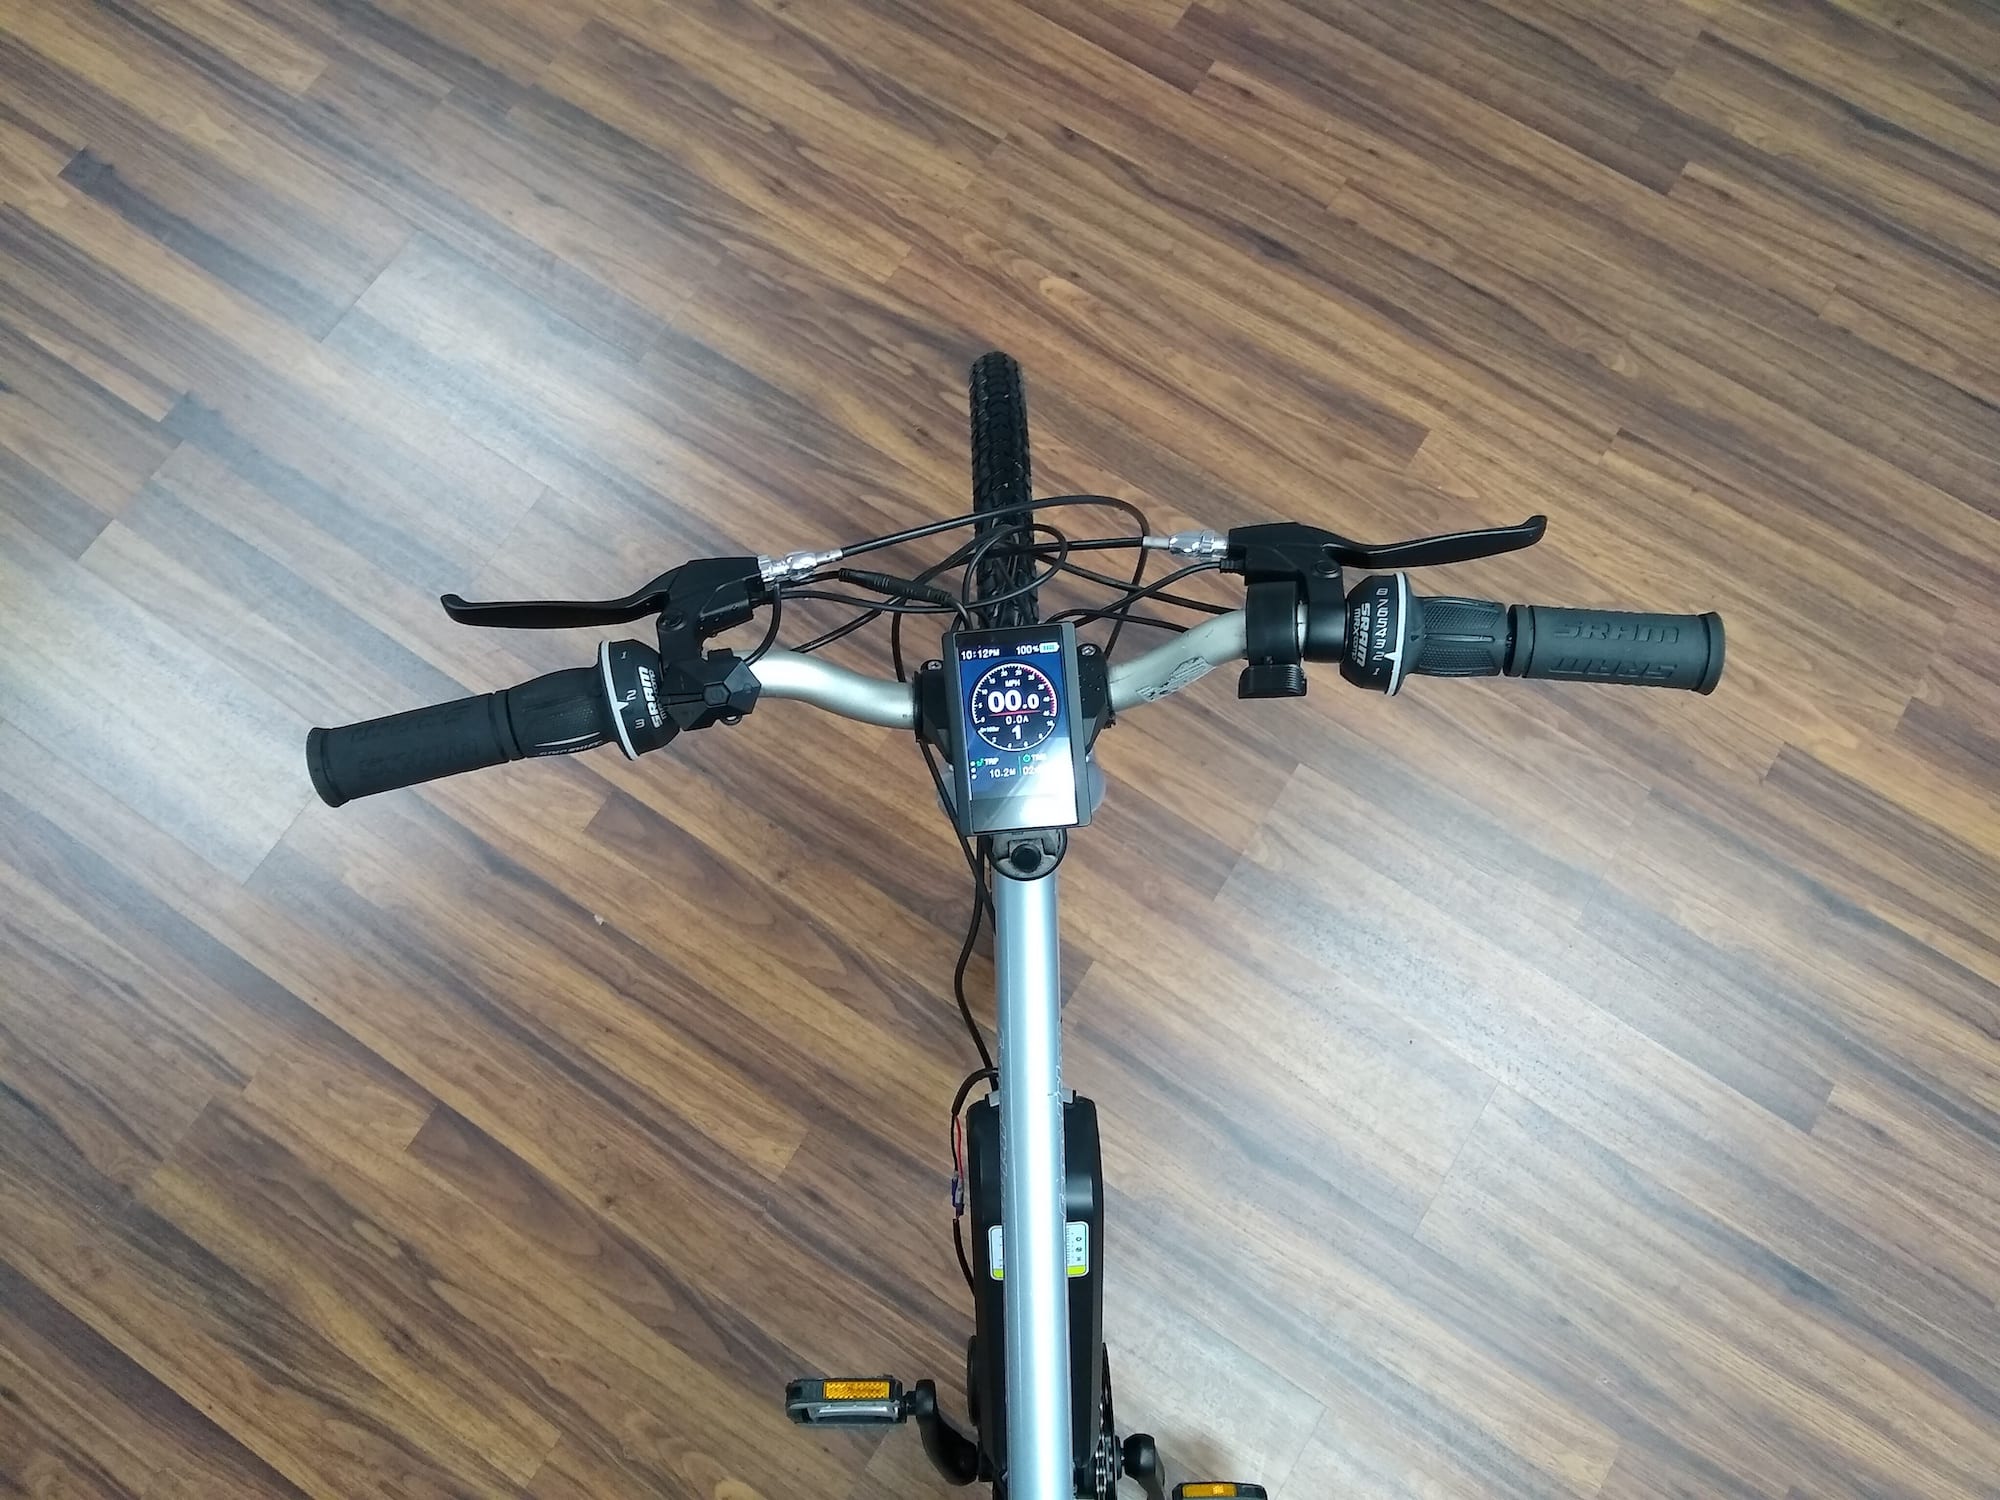
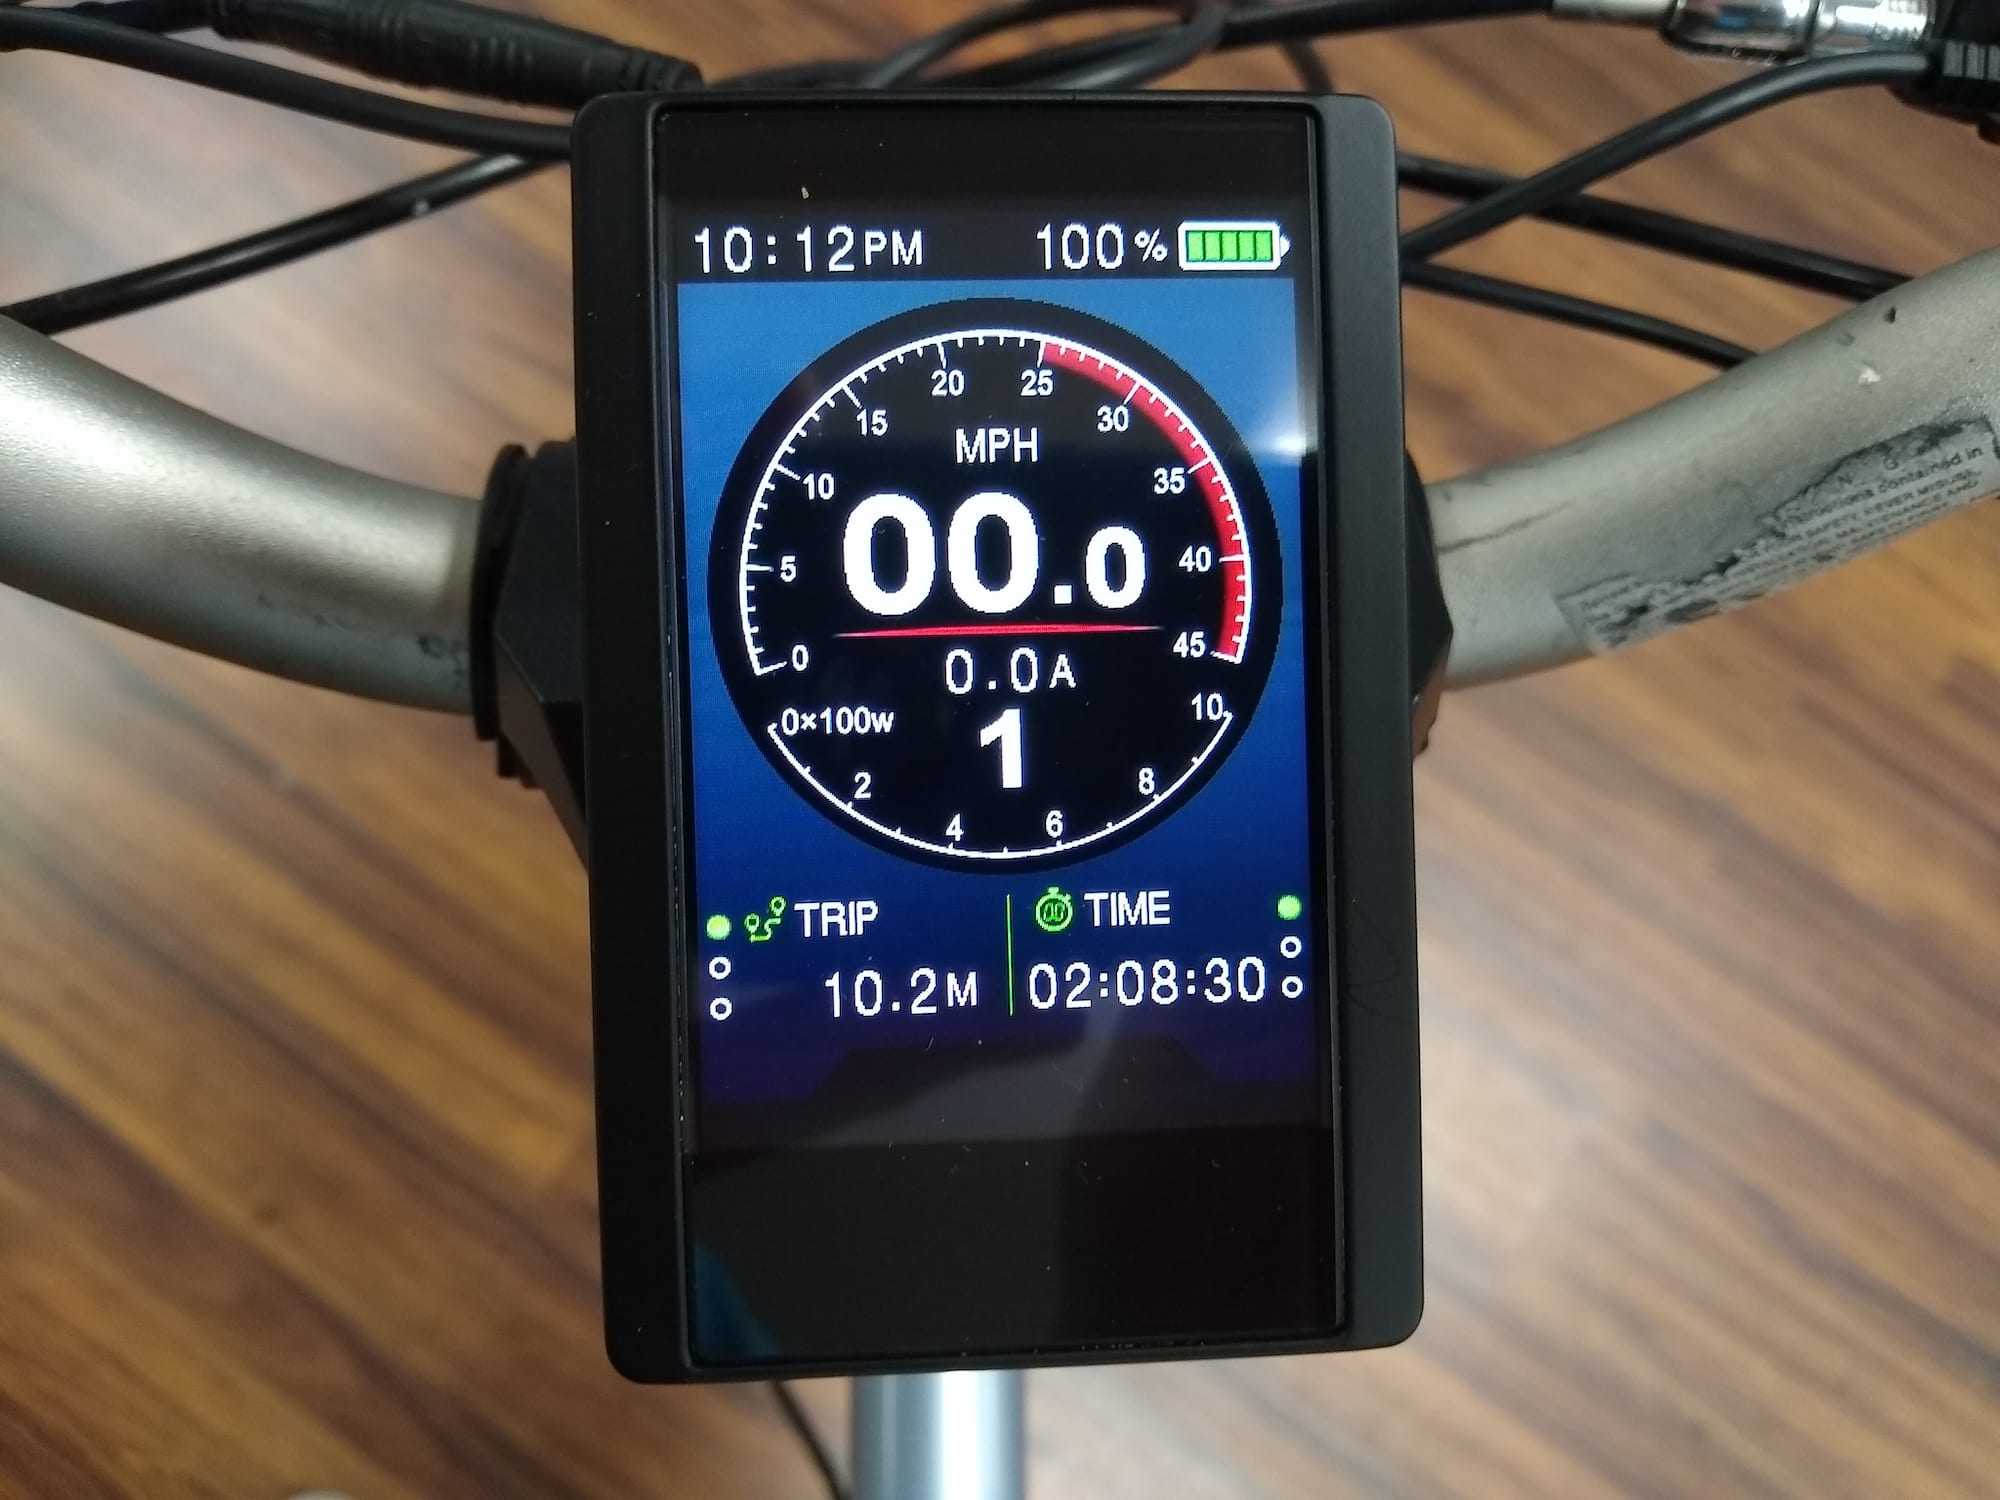
Interfacing with the rider is the APT 850C display; a full-color LCD display with a speedometer readout, wattage display, bright backlight and a standard set of counting metrics. The display is easy to read, and easy to recognize for anyone with a driver’s license. The speedometer is designed like a car, and the simple, central pedal assist number is easy to find when glancing at the display. The battery indicator is nestled in the top right of the display, both with an active battery picture showing remaining charge, as well as a percentage measurement that can be changed to a voltage measurement in the settings menu. I would like to see the battery indicator be a bit more prominent, realizing not everything can be front and center at the same time. I do find it amusing that the system has a “red line” indicator on the speedometer that ranges from 25mph to 45mph. Usually, I’m at my happiest riding a bicycle between those speeds. This display includes a left-hand remote switch for operating pedal assist and display functions. The small, tactile switch with clicking button confirmation is very nice in such a small package. I was expecting to find a small quasi-hidden button on the remote (perhaps for walk assist, or headlight) but none was found, only the up, down and power buttons are present. As a result, it was tricky for me to discover how to open the settings menu. I set the bike for tire size, imperial measurements, and so on. To open the settings menu, I started with the bike turned on, then I pressed the power button quickly, then held the second press for a few seconds. This opened the settings menu quite easily, once I knew how. But by golly, I must have tried each combo of 1,2,3 buttons for quite a length of time.
One regret I have about this review is the battery mount. As stated, I was obliged to mount the battery “upside down”. It sounds a lot worse than it actually is. The battery mount is designed to fit onto the water bottle mounts on the bottom tube of the bicycle. Easy enough. The mounting plate includes two spacers with a rounded edge on one side, and a flat edge on the other, are are fitted to be received by the mounting plate quite well. The regular screws for a water bottle fit back into place where they came from, with enough clearance for the battery to slide on like normal. The mount has a 4 pin terminal at the bottom to receive the battery as it slides down the mount. The battery has a 4 pin connector to join the mount, and snugly fits into place with a nice flush look. The battery also uses a locking mechanism to lock the battery onto the plate, obstructing access to the mounting plate itself, and therefore secures the battery to the frame of the bicycle. Special note: the key is not required for ignition or electric assist; it only physically locks the battery to the frame. Although small, the battery also has a charge level indicator that is button activated. The battery casing is quite large, but this is largely due to the modularity of the battery system from EUNORAU. Available in this same size is a 36v and 52v system, so in order to keep value high, likely order one battery case and fill it with various packs depending on customer demand.
The 48v 14Ah battery, coupled with the 500w motor is a refreshing upgrade from the common 36v 14Ah battery found on many production mid-drives. The larger battery capacity enables for more power to run through the motor at a given time, and if you’re disciplined enough to take it easy, then would also enjoy a greater range. The battery is heavier on account of this, 8 lbs on a bathroom scale, but having the battery weight mounted in the middle of the bike in a lower position, definitely mitigates the balance concerns. I think this kit would do well in an off-road setting based on the torque sensor, the slim motor profile and the low battery weight. Naturally this would be very difficult to mount on a dual suspension bike, as the middle triangle of the bike is often occupied by the suspension system. But, for a hard-tail application, I think this would be a great system.
All in all I’m very impressed with the Tongsheng kit from EUNORAU. Along with the great motor, there is a lot of value aded with a large capacity battery, full-color display, and the throttle. This makes for a great system for a variety of applications. Aside from the inherent challenges to a kit, my only complaint is the rudimentary connections for the battery mount. With any kit, one must be prepared to service their own bike and be studious to be sure the system will physically fit the bike, and meet their personal needs without the ability to test it out in person. As always, we welcome feedback and comments below, we also just launched a EUNORAU forum section where you can connect directly with others and share your pictures, videos, and deeper questions :)
Pros:
- The torque sensor in this motor is definitely a highlight. It’s a great feature to have at all, but the programming and sensitivity is very comfortable and predictable
- 48v 14Ah battery can put out a lot of power, and maintain use for a healthy duration. A total of 672Wh is a bit more than many electric bikes that use a more standard size about 500Wh
- The full-color LCD display is easy to read, and has all the standard features at the ready
- The system enjoys a 2 year warranty, a good length of time that isn’t as common in the conversion market
- Color coded cables make the conversion process very simple. The cables are quite plug-and-play both in color, and also they have a specific fit for each purpose
- Waterproof connectors are a great plus on this bike. I’ve personally seen connectors like these submerged in water without issue, (Don’t try that at home) but for me it means I can ride in the rain, snow and ice without hesitation. Well, without THAT hesitation 8^)
- Given the 500w Output of the motor, it is relatively quiet when the gearing is properly set
- Having a throttle control on the bike is a great feature, in many situations. It’s not an easy combination to find an electric bike with a throttle and a mid-drive utilizing hall-effect torque sensing
- Low profile of the motor allows for better application off-road, and paired with the torque sensor, would make a great finished bike
- Having a USB charge port on the display can charge a phone while getting directions, running to an appointment, or for charging a bicycle light with the proper adapter
- The mounting plate for the battery is simple, and strong. It secure the battery very well, and the included lock is a great added protection from theft, and from the battery vibrating out of place
- The Tongsheng motor mounts quite easily and securely to the bike. Once the old parts were out of the way, the motor slid into place and secured well with the included hardware
- EUNORAU puts together a great value proposition, with a full color display, large battery, water-proof connectors and throttle
- Having a 42 tooth chain ring on the motor is a good mid-range for various applications. Too small of a chainring is better for off-road, whereas a larger ring provides better torque at speed. 42 is a great compromise
- You can activate walk mode to help move the bike by holding the down arrow if it is standing still. Although a bit redundant with the throttle, it allows the bike to be powered only a little while walking alongside
- Can also opt for a smaller motor (36v) and smaller battery to meet budget or legal restrictions
Cons:
- This kit doesn’t have any provisions for a hydraulic brake sensor for inhibiting the motor
- The Tongsheng motor is not as popular os other conversion systems, but they do have a long reputation overseas as specialist in electric bicycle components
- Utilizing the battery mount, this consumes one place where a water-bottle or accessory would have been stored
- The kit includes two zip-ties for mounting the speed sensor, but only those two. It’s a small thing, but including more zip ties would be a considerate (and inexpensive) suggestion
- The little rubber cap that protects the charging port on the right side of the battery can sometimes be difficult to seat, it’s a minor annoyance but something worth fiddling with each time to protect from dust and water
- Installing a kit like this will take a bit of time, energy, and possibly additional tools like a crankset puller and bottom bracket wrench, you might even want to get your local ebike shop to help you, and that adds to the price
- The battery mount has two terminals that don’t enjoy a water-proof connector, and I would recommend protecting them for final installation
- The kit comes from EUNORAU, an electric bicycle and kit company based in China. The kits are shipped from China, so there is a bit of lead time and potential for language challenges when contacting for service
- The battery charger is a bit basic, only offering a standard 2 Amp power output, and it’s not super compact or lightweight at ~1.9 lbs… still, it should fit into your backpack or other bags easily for charging on the go
Resources:
- Official Site: https://eunorau-ebike.com/
- More Pictures: https://photos.app.goo.gl/6tKWZBSdrYjAoUbE8






Mike says
I’ve installed several of these kits for clients. Eunorau is one of the few out there, who offer this version with the 850C color display. It’s a nice little kit, but you can get the Bafang BBS02 500 watt, or even the 750 watt for around the same price, with the 850C display. Also on the 850C its one of the few displays available on a kit that also has a USB port for charging other small devices like phones. I think this kit is a good fit for adult trikes, and even recumbents, especially with the torque sensing. If you have a bike with two front sprockets to give you more gears, Tongsheng also offers that two sprocket chain ring as an aftermarket option. Usually that has been a drawback of converting some bikes, as most of the time, you’d have to go to just one chain ring with most of the mid drive kits, which means removing the left hand shifter, front derailluer, and losing some top end speed. With the smaller front sprocket you can gain a bit of low speed torque, which will help you and the motor conquer hills a bit easier.
Court says
Hi Mike! Great feedback about the adult trike application and double chainring option. Thanks for taking a moment to share your perspective, I’m sure it will help others who are exploring kit options :)
Herbert Torres says
You failed to list under cons that the motor has no provision for a shift sensor which to me is probably more important than a torque sensor since you can get instant torque by manually using the throttle when accelerating from a stop.
Court says
Hi Herbert, that’s a great point. It seems like the shift sensing software on Bosch and the physical sensors on some Bafang mid-motors improves the reliability and smoothness of shifters. Mikey covered this ebike so I can’t add much around how it “felt” to shift, but it’s something good to remember for us with future reviews. I invite your feedback if you end up buying the kit someday :)
Herbert Torres says
I own a Bafang mid drive with the optional shift sensor and it definitely makes shifting smoother.
Mike R says
Shift sensors are over-rated, as for one, they often don’t activate until AFTER you begin to shift, and two the interruption to reduce torque applied to the chain/ and rear gears, that they induce is not a preferable response to how most people ride. The way this motor is designed, and how the torque sensing is done, there is no thrashing of gears when you shift properly. Even on a regular bike, its never a good idea to shift under hard load, so as long as you are being prudent about how you are pedaling, you won’t have any issues. Further, even a momentary pause prior to shifting will do plenty to prevent what other mid drives are unable to accomplish. For example, don’t wait until you are on a hill to shift. You need to anticipate before you get to a situation that requires shifting, and adjust your cadence appropriately in order to maintain rider momentum. You are much better off going into a hill at a higher cadence, than a typical cadence on a flat, than waiting until your cadence slows down while on the hill. So if you apply those principals with mid drives, then you really don’t need a sensor. Sensors for shifting, also fail quite frequently on mid drives anyway.
The only way you provide a real effective sensing to appropriately decrease affects of shifting on the drive train, is by implementing what Yamaha does on their own brand of ebikes, with a rear wheel sensor that measures speed (1000 times a second), which then works using algorythms, and two other sensor types, working together with software, that will anticipate your shifting. Its done in a way, that you can’t even tell its doing what needs to be done. Yamaha is the only system though that does this, where others attempt to imitate that, but only with sensing at the bottom bracket, and its non-anticipatory, not knowing whether you are on a hill or not. If you want to spend $2300 to $3400 for this, then by all means, go with a Yamaha ebike. But at a $1000 price point, the Tonsheng does a pretty darn nice job.
If this was a $3000 to $5000 mid drive, it would be appropriate to mention the lack of it as a ‘con.’ On this kit, and for what most people would need or expect at this price point, I think Court did the right thing in not listing it. Lets keep expectations in line for the price points, otherwise you are mis-leading consumers into thinking they SHOULD get this feature on any mid drive kit.
Dave B says
I have to agree with Mike R, that shift sensors aren’t needed, because any experienced biker shifting gears is going to let off on the pedal force, and the whole advantage of torque sensing is that it can act instantly to also reduce the torque supplied by the motor. The rider is in control. Yay.
An ebike with only cadence sensing, however, can’t react so quickly, which is why it usually isn’t used on center drive ebikes. It works fine for hub mounted motors, because only the rider’s effort goes into the chain and sprockets.
Court says
Great points Dave, thanks for your input!
Graham says
Hi there,
I’ve been TSDZ2 conversion kits from different companies, and I like that this kit has the 850c display and good connectors. I know I can probably make any display work with the motor with the right amount of time, but I was hoping for this to be a fairly quick conversion. Having said that, I am hoping to have a 750 W setup, and so I was wondering if you could confirm that this motor is limited to 15 A output? I couldn’t find any info on their website and haven’t had a response back from the company yet. Thanks!
G
Takashi says
Hi folks, nice review. Mikey explained that the water bottle mounts used for the battery were too low on the Specialized Expedition and that required him to mount it upside down. Can you tell me how high up the holes sit from the lowest point on that part of the frame? I’m considering using a Specialized Crossroads A1 Elite frame, but I’m worried that I may end up with the same battery situation. Is there perhaps another way around it? Maybe a skinnier battery pack? If that’s the solution, what do you think is the maximum width for the battery case that would allow it to fit right-side up? Thanks!
Mikey Geurts says
Hey Takashi, on the battery mount, the lowest mounting point on the attachment rail is 6.5 inches from the base of the battery. The problem I ran into was that the battery is supposed to sink into place, but it was obstructed by the seatpost tube, and didn’t get firm contact with the terminals. As a result, I’d recommend looking for a bike that has 7 inches of space from the lower bottle cage attachment to the seatpost tube. The battery pack mount used in this review is a very common one, called the HaiLong. Avoiding this battery may solve the problem, but it could lead to different considerations as well. I’d recommend stopping by your local eBike shop for further help. Thanks for your question.
Mikey